|
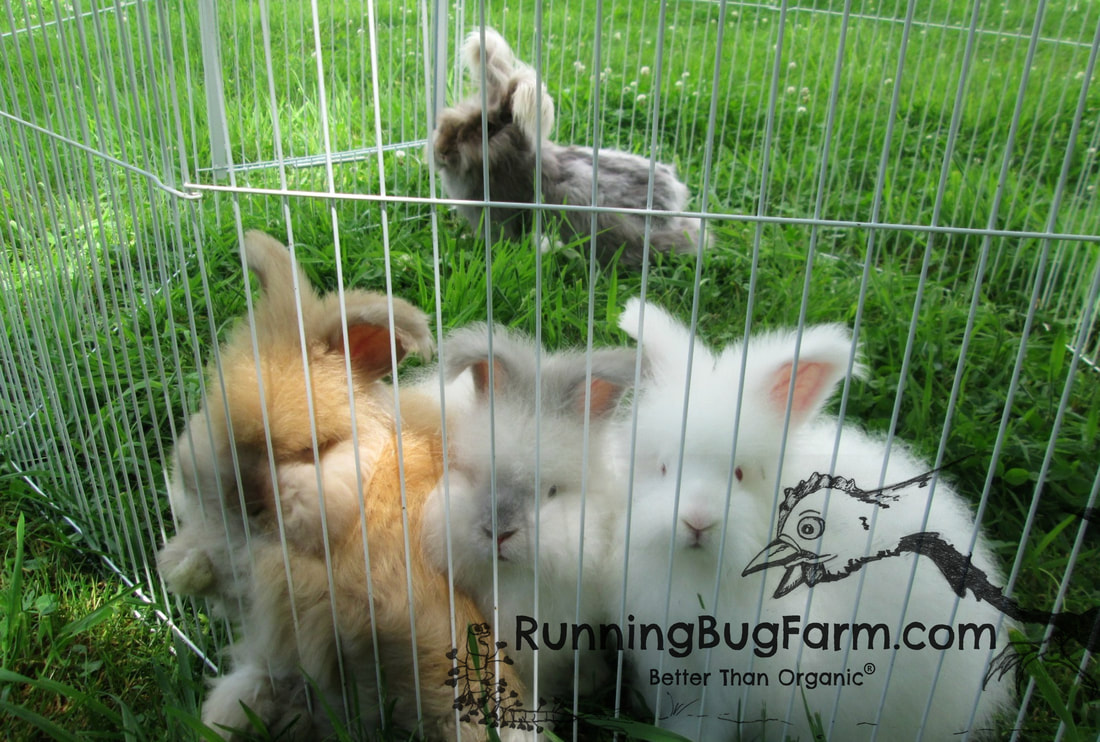
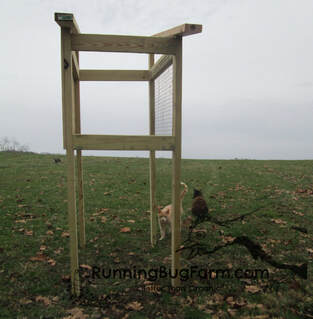
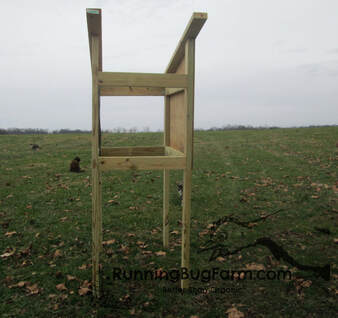
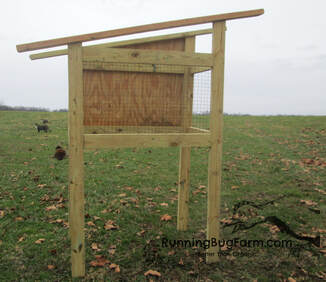
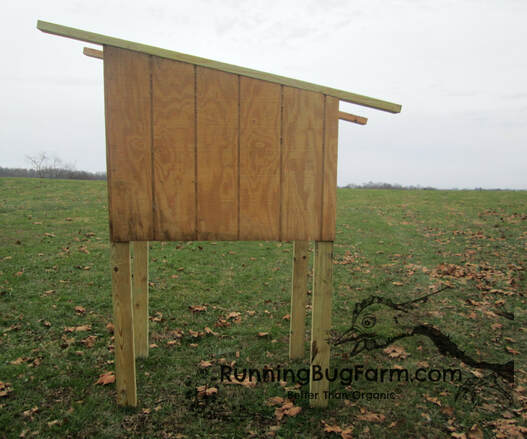
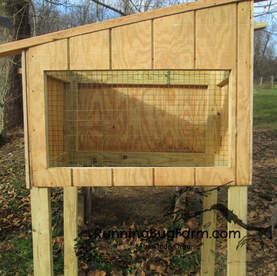
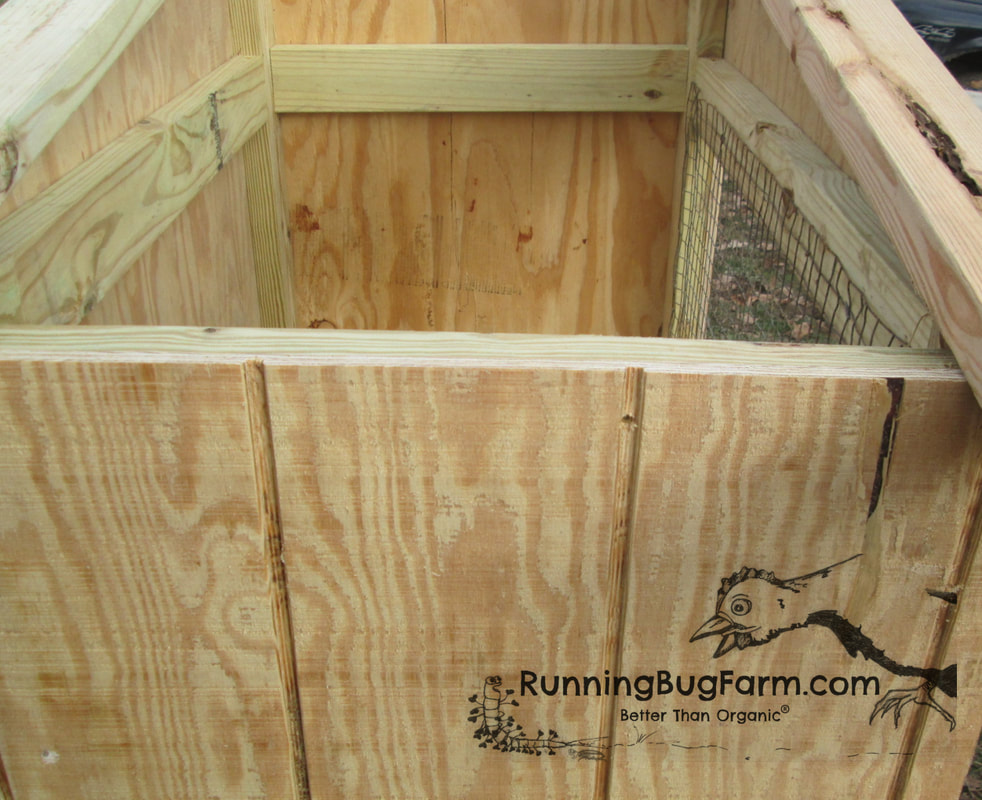
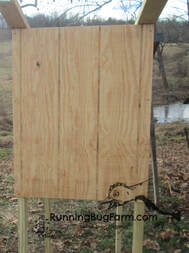
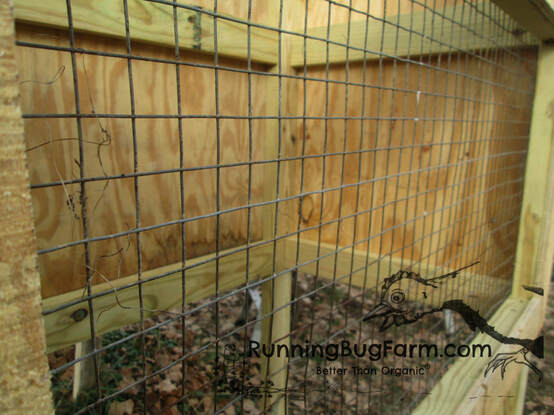
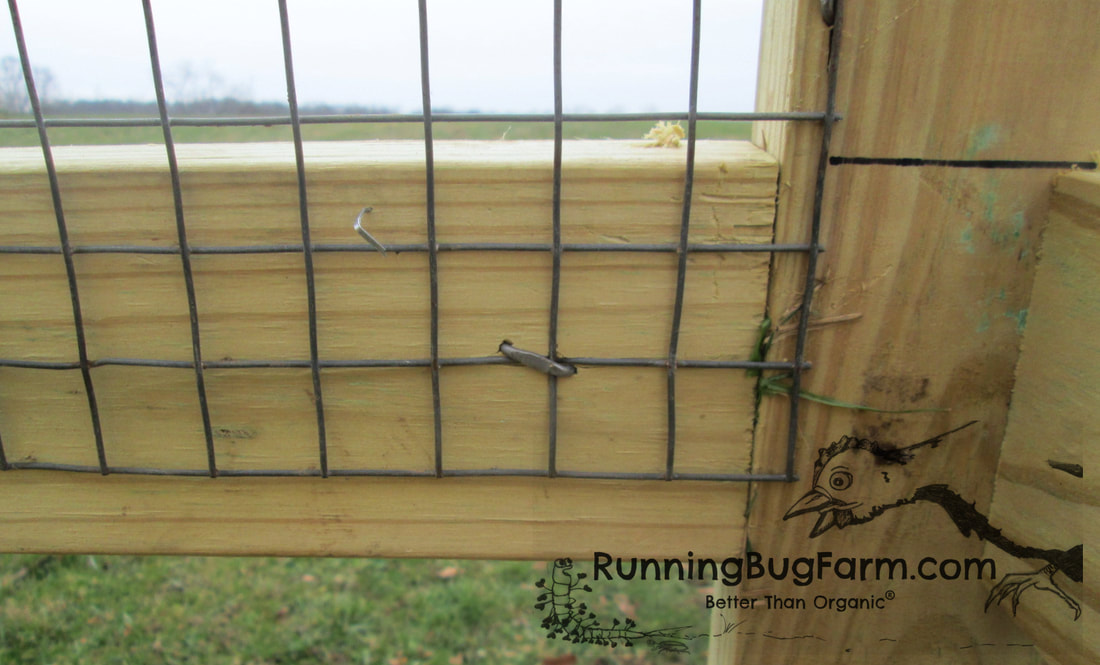
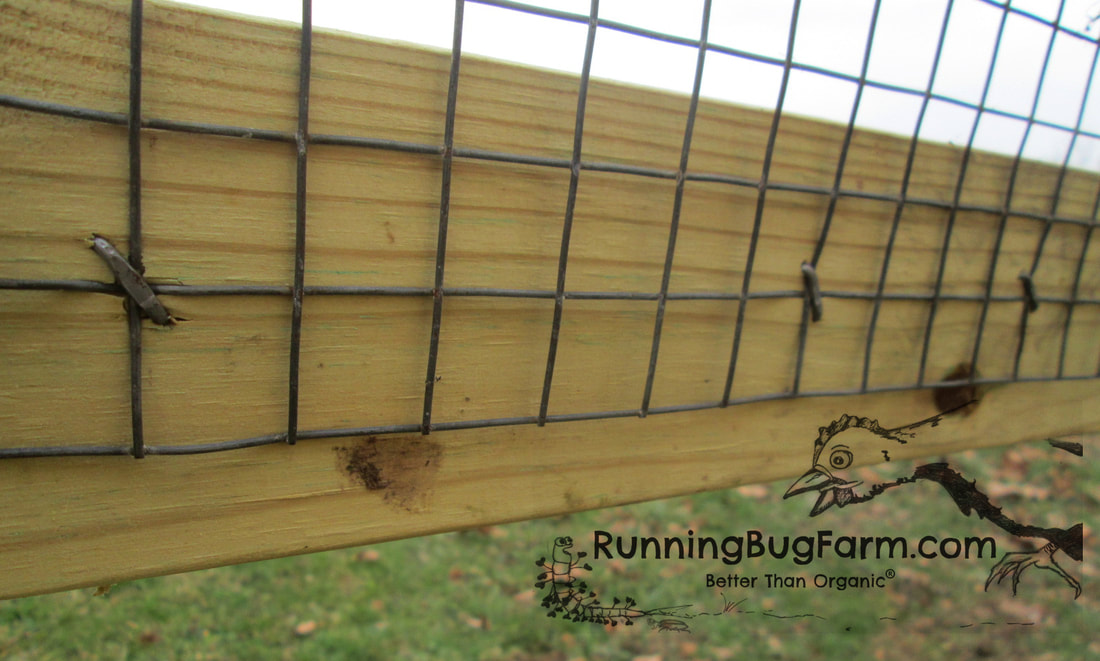
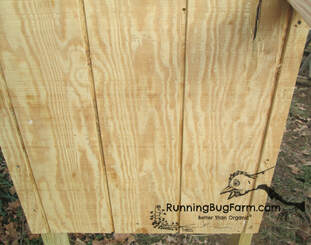
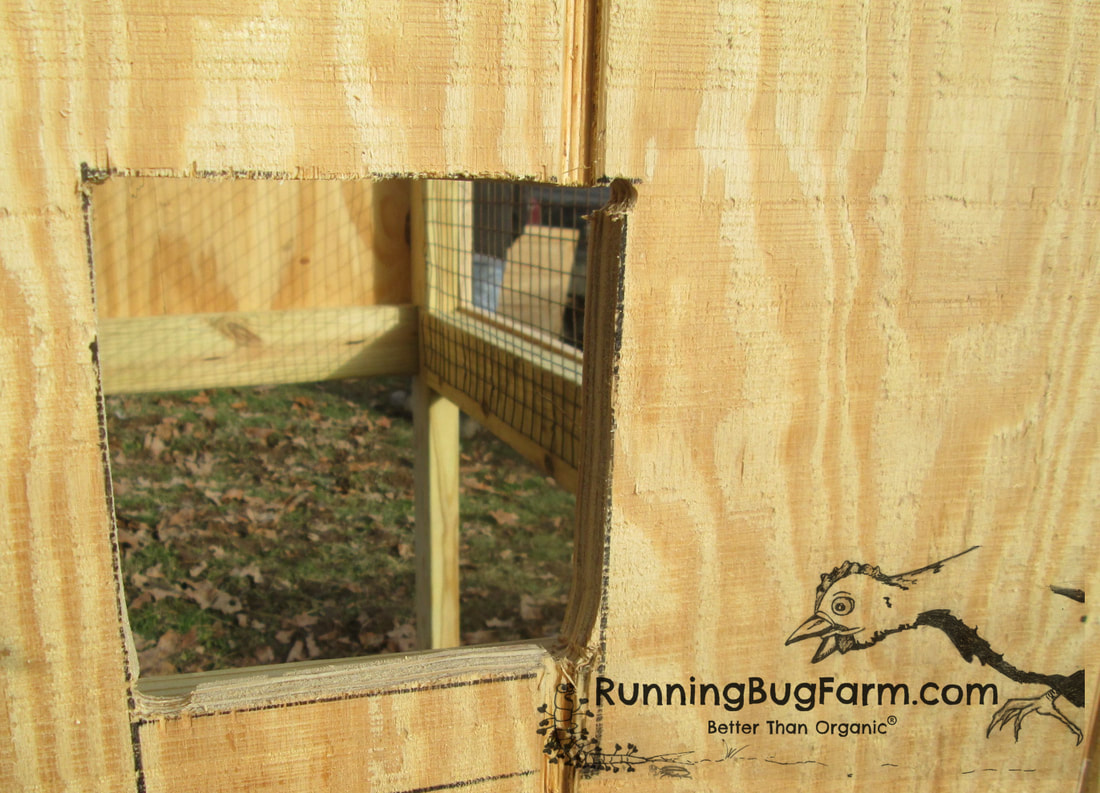
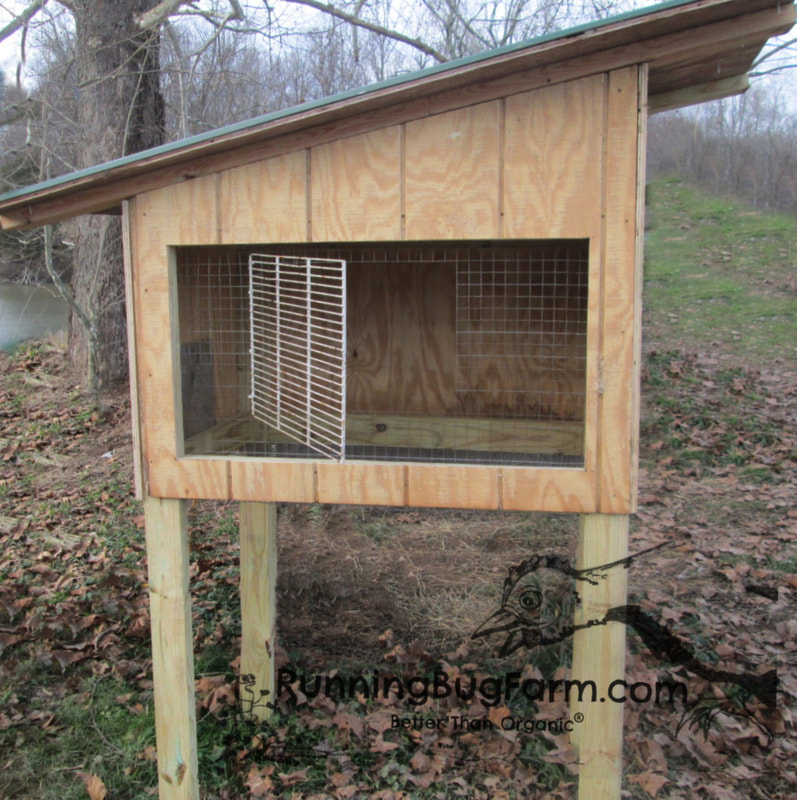
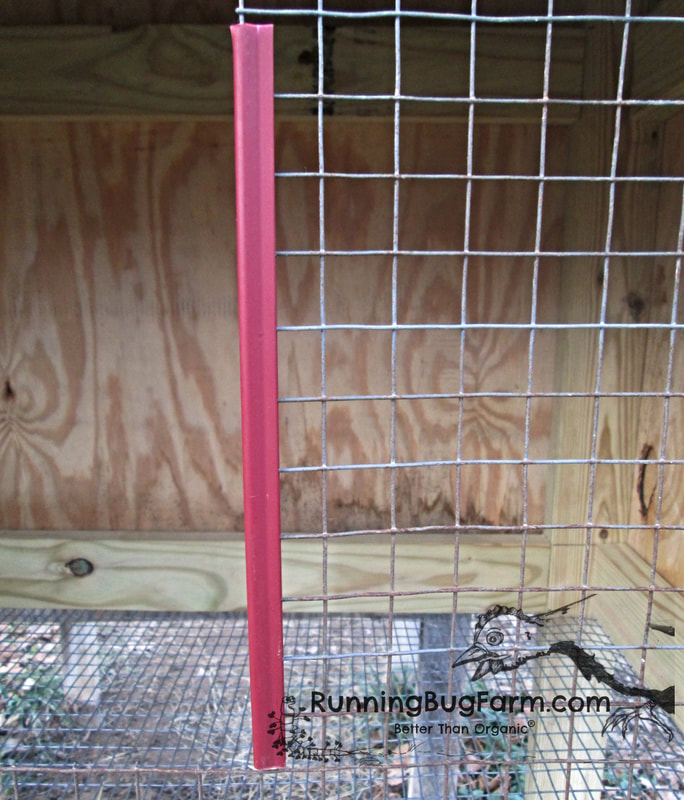
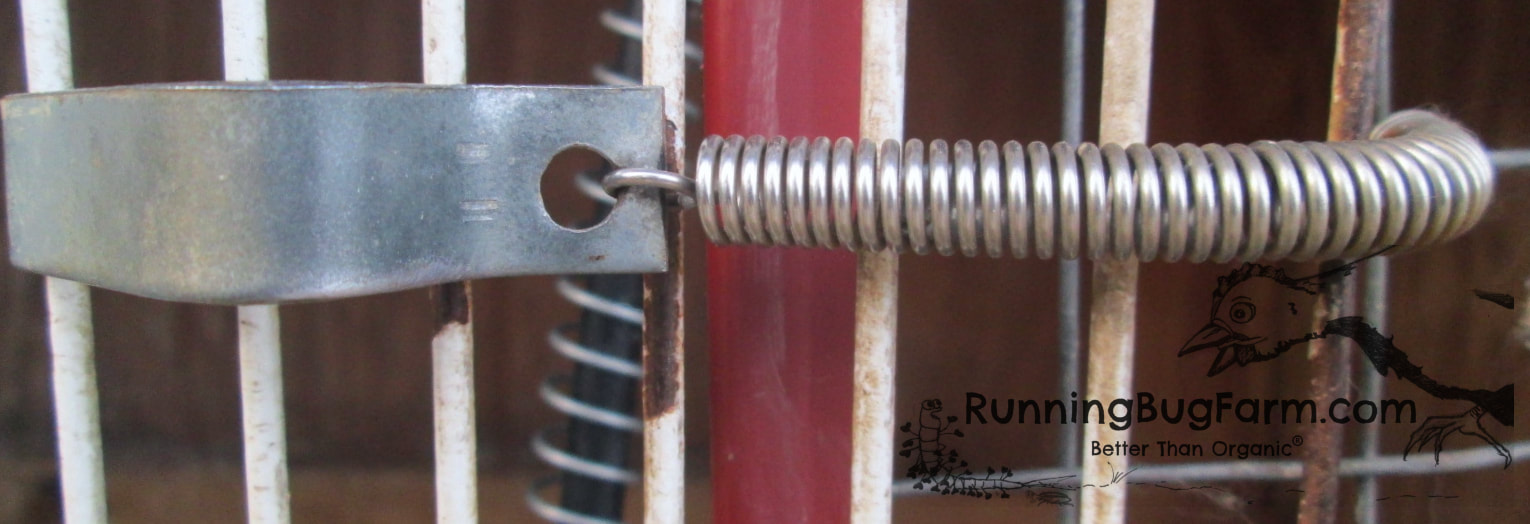
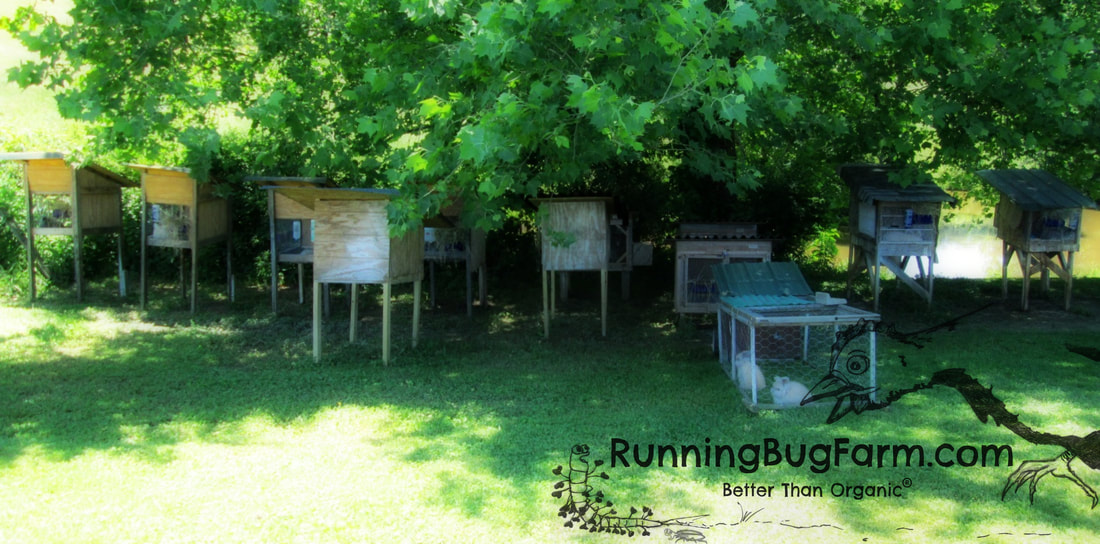
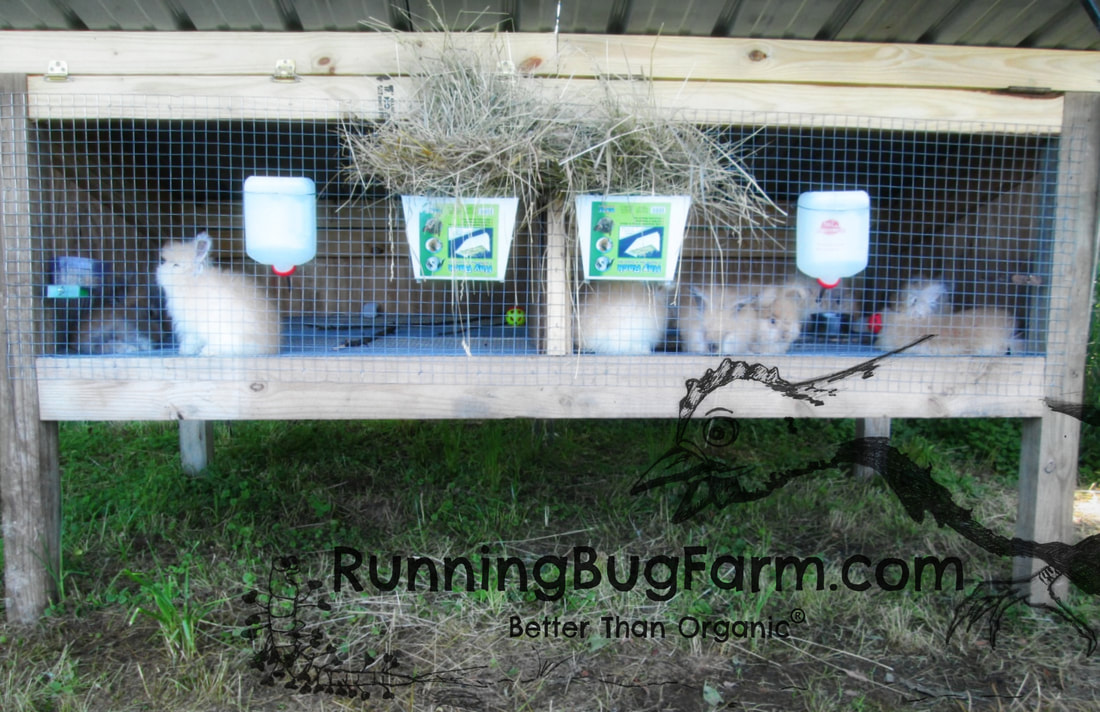
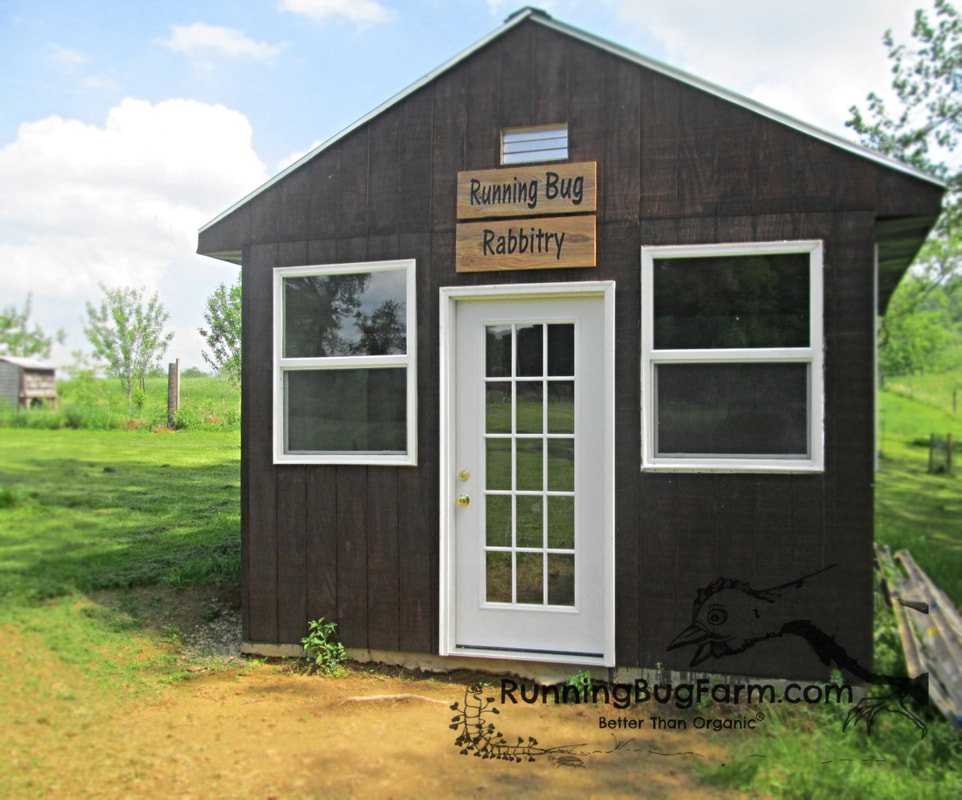
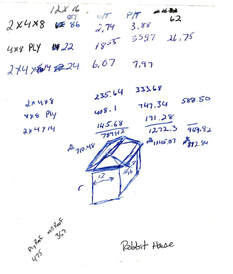
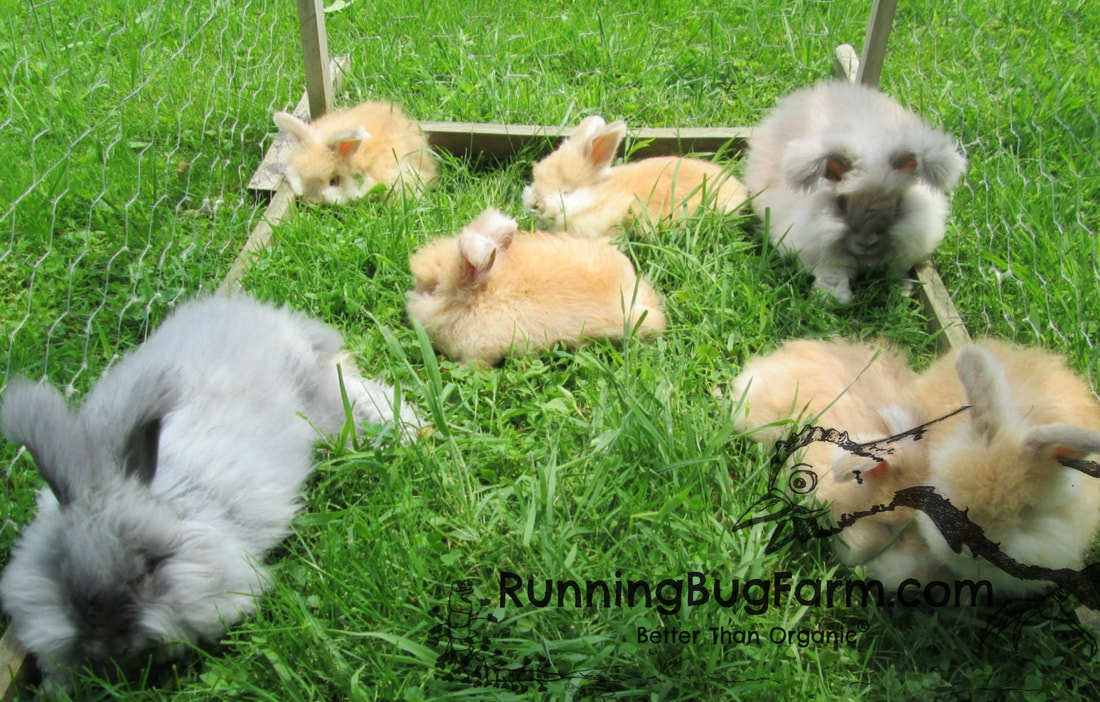
Before you start building your rabbits home, you'll need to scope out your property. You want to put your rabbits housing where it will be in the shade for the entire day. If you don't have shade, you will need to build a sturdy, permanent, shaded canopy similar to a car port. Make sure the roof has the proper pitch for water run off and that the roof is of sufficient size to block the sun for the entire day. The larger the shaded area, the cooler the area will be which is critical in the summer. Even in winter direct sunlight can overheat a rabbit wearing a full coat. A rabbit should never be housed in a way that they cannot find relief from the sun. For added protection, pick the side that the wind most often blows from and build a wall there. If you already have adequate natural shade, you will need still need to consider the wind. Make sure the back wall of your rabbits home faces the wind. The back wall of your rabbits home should not have any openings. Do not ever place the open areas of your rabbits home against the wind. Here is the frame of a basic angora rabbit hutch. The back wall has a sheet of solid plywood. The minimum size for your back wall should be no less than 27x44x69". The hutch is off of the ground considerably to work with my height so that I don't have to stoop to get inside the cage to clean it or access the rabbit. An appropriate height also enables me to see inside the hutch at a glace which means I can quickly see how each rabbit is doing. Most of the time they hop over to the door to say hello or they are zonked out sleeping on their sides. The second photo on the right gives you a good view of the high point of the roof. This gives the rabbit plenty of space to stand up fully on his or her hind legs to stretch and look around. If your rabbit cannot extend their body fully and completely in all directions, their home is too small. As always our barn cats (these are all cats that we have adopted and had spayed/neutered) love to be involved in all of our activities. Pictured is George, Mickadoo, and Marshmallow Pants. 🐱 In the first photo to the left you can see the front of the hutch which is the side with the wire. The back is the plywood. The sides have nothing on them as yet. You can also see the slant at the top for the roof. I am an imposing 5'2" tall. John builds my rabbit hutches 62" off of the ground. Plan the height of your hutch based on the individual who will be spending the most time with the rabbit. The second photo to the right shows the back of the hutch (size minimum 62x44x69"). You can see the bottom of the plywood is a bit weathered. This is because it was being stored in the hay barn. This was from extra barn siding (that is what this type of plywood is called). When possible, John will utilize leftovers from other building projects to build me my bunny homes. New lumber is only purchased when necessary. The barn cats in the first photo are Mickadoo, Marshmallow Pants, and Black Nose Sun. 🐱 Rabbits love to chew. Using fence staples, hammer 1x1" or smaller metal fencing to the wood so that it covers any and all exposed wood. This is especially important if you are using any sort of treated wood. 🐰 The first picture on the left shows the shorter side wall (size minimum 28x27"). This is the side the nest box (or hidey hole if applicable) will go on. The second picture on the right shows where John cut the hole. He uses marker to draw out the spot and size. He then uses a 3/8 drill bit in the corners. Then he inserts a jigsaw to complete the cut. The size of the hole is 5x5". The roofing will be extended far enough so that the eve fully covers the nest box from the elements. Any run off will drip beyond the nest box and onto the ground, not on the nest box. This particular hutch was built with a more narrow roof due to the amount of salvageable supplies on hand. My preference is to have a generous eve on all sides of the hutch. A larger roof will help to keep the hay dry, protect the hutch in general which in turn increases it's lifespan. More importantly, a larger roof, provides extra shade and protection from the elements. Even though I keep all my hutches shaded, there is nothing wrong with a little extra protection. The roof and door (17x13") are now installed. First plywood is put down then tin roofing. You can use whatever roofing you prefer. Before we moved here, we always used roofing shingles. Once we starting to work with tin, we found we love it. It is light, easy to use, and doesn't catch on fire. We also like the way it looks. The only downside to tin, is the sharp edges. For the door, John cuts out an opening big enough for me to fit my torso in. This gives me full access to the inside of the hutch. The door used is simply a cut section of wire pantry shelving you can buy at any home improvement store. One of the nice things about using the wire shelving is the wide wire spacing and overall strength. I attach my hay racks to the outside of the doors. The wide bar spacing means it is very easy for the rabbit to access the hay to eat it. The pantry shelving we have enables John to build larger doors, but the bar spacing is tighter, so it's not as easy for the rabbit to access hay. The wire closet shelving that we have is smaller but with wider spaced bars. When John uses this shelving I end up with a smaller door that I cannot fit my body through but the rabbits have a much easier time accessing the hay in their racks this way. The wire shelving door is then secured on one side to the cage wire using three large zip ties as hinges. While this isn't exactly pretty, it works very well and is a very easy set up. If you want something more attractive, you can frame out the front to have a more traditional door with wood sides and a cage wire center. When the nest box is not in use, a piece of plywood is screwed to the inside of the side wall to block off the hole. If you choose to build a hidey hole, you can leave it open. Because the wire is very sharp where it is cut, I attach plastic guards to the side. I get these whenever I go to a rabbit show. I find that rabbit shows have the best selection and prices for a wide variety of cage supplies. Note: The front of the cage is built using 1x1" fencing. The bottom wire is built using 1/4x1/2" fencing. You can also use 1/4x1/4" fencing for the bottom. It is even more gentle on a rabbits feet, while still keeping them dry and clean, but the pellets from a rabbit with a very healthy digestive system, will sometimes be too large to pass through the 1/4" holes. When the hutch is ready for the rabbit, resting mats are installed to protect the rabbits feet. Keeping a wire bottom insures the hutch stays clean and dry. An angora rabbit can and will get dirty very quickly if kept in inappropriate housing. If you are very concerned about sore hocks, there are a few things to consider. The number one cause of sore hocks isn't wire floors (if the hole spacing is correct), it is instead due to unsanitary living conditions. By keeping your rabbits home clean you have greatly eliminated the risk of sore hocks. Here are a few options while maintaining a wire floor: Use resting mats in the summer. There are many options here. You can get plastic ones that secure to the bottom of the cage. I stock up on them when I go to a rabbit show. Like the wire guards, I tend to get the best prices and variety at a rabbit show. You can also order them online and should be able to find them at your local farm supply store. If your rabbit likes to pull up the resting mat, you can attach it with zip ties, smooth wire and even twist ties if long enough. If using zip ties, the rabbit is likely to chew it off. When the mat becomes damaged and rough, it is time to replace it. It should be removed and cleaned with hot soapy water once a week. Woven grass mats are a more Eco friendly option, if you'd like to avoid plastics. Woven grass mats do double duty. They not only provide a comfortable place for your rabbit to rest, but they also provide your rabbit with something to chew and eat. Like the plastic resting mats, you can secure these to the bottom of the cage with either the zip tie or wire method or go a bit more Eco friendly and use natural twine or cotton rope. As with most everything, it is highly likely your rabbit will chew the rope or twine. Woven grass mats need to be discarded if they become soiled. Unlike plastic resting mats, you can toss a dirty woven grass mat into your compost pile. If you decide to purchase woven grass mats, keep in mind that they come in a variety of sizes. Use hay bedding over the wire floor in the winter. This will mean that you must clean your rabbit every single day to remove hay and feces from the rabbits coat. Usually within a week the hay will need to be removed, the hutch brushed out and new hay installed. A great thing about this method is that rabbits tend to consume a lot more hay with this method. This results in much healthier droppings. The rabbits pelleted droppings will be large, loose (not strung together) and round. This is a sign of a very healthy digestive system. You can also provide a digging platform. They tend to be very sturdy and built with wood and rope that is safe for a rabbit to chew and hang out on. They are a wonderful option to help keep your rabbit mentally stimulated while also providing a place for your rabbit to rest. A wire cage bottom helps to keep the bedding dry, which cuts down on ammonia which is much healthier for your rabbits respiratory system. If having a hutch stuffed with hay isn't realistic for you, if possible, try to utilize this method for a week or two after you have sheared or gently hand pulled your bunnies coat. When the coat has been removed, you have very little maintenance during this period. If you left long wool on the ears and face, you will still need to groom those areas. If you removed the wool there as well, a once daily checkup to insure all is well is likely all the grooming attention your rabbit will need. These are two examples of some of the door latch options you have. The latch pictured first on the left is very strong, but can be difficult to grasp. The door latch pictured second on the right is a lot easier to grasp but not as strong. I have never had problems with either type of latch and currently use each type. Like the wire guards and resting mats, I pick up a handful of these when I go to a rabbit show. These spring latches are another option you may wish to consider if you like to order mainly from amazon. You can also opt for much more attractive (also typically more expensive) barrel latches, locking sliding bolt latches, &/or hasps that would work all well should you choose to build a door with a wood frame. Pictured is a little bit of Bunny Town in the summer. Each hutch is a little different. John built them over a period of more than a decade, so different ideas and slight material changes are to be expected. To the front right you can see a rabbit tractor. If you are not ready to build your own, you can use pens instead. Rabbit tractors are a great way to enable your rabbit healthy quality time on fresh grasses. They are able to enjoy tasty tidbits that they forage for while also being protected from ground and air predators. A inner shelter gives them a safe place to hide or hang out. Roofing on top of the run helps keep the sun off of them as well as being calming. An open sky overhead can be very stressful to a prey animal. As you can see in this photo, I keep the rabbit tractor in the shade just like I do their housing. Bunnies love rabbit tractors. Pull up a lawn chair and let them entertain you as they dart about, do binkies, dig, sprawl out and for whatever reason will even do a bunny pile up - in the summer! Ugh. But it's their choice. They have plenty of room to bounce about. To use a rabbit tractor properly, you need to keep it moving. The housing section has wheels. It is lifted from the front to be wheeled to a new location to give the rabbits fresh forage. This concept is exactly the same for our chick tractors. We got the idea from Joel Salatin. This is a very big rabbit duplex that was originally created to hold junior rabbits from multiple litters before they reached sexual maturity. One side held junior does, the other held junior bucks. Like the hutches, the roof is on a slant, but unlike the hutches, the roof lifts up and away from the base for easier access. The reason this method was decided on verses traditional doors was due to the large size of the duplex. There was no way I would be able to reach all areas of the inside of each side if I had to do it through a door. Having the entire roof lift up gave me access to all sides with a tad bit of difficulty reaching the very front. This is also lower to the ground compared to the hutches. If it was higher, I would have required a ladder to be able to reach inside. The rabbits love hoping about and playing in this duplex. As with the hutches, they are given resting mats, but no hay to rest on because junior wool is a lot more work than adult wool. If I'm using the duplex to hold an adult rabbit, I use whatever type of bedding I feel is suitable at the time. This can include hay. If you are considering building this type of structure for your rabbits, here are a few problems with this design that you will want to improve upon. The good thing about this duplex is the size. The more room you provide your angora rabbit, the happier he or she will be. If you want, you can even build this as a single unit. You can't go too big, but you most certainly can go too small when it comes to building your rabbits home. Due to my short stature, the back of this duplex is a bit low. Lower than John and I like, but the front is plenty high to make up for it. The height off of the ground is more than suitable. Having the tin roof lift up and away from the body is awkward and heavy even without a plywood support. The wind can catch the roof and potentially damage it. The method utilized to keep each sides roof open is to attach a handle at the lower side corner and lift up. A section of rebar is then inserted into a hole that has been drilled into each corner of the frame base and each corner roof frame. Being a duplex, this means there are four total supports. Each duplex roof lifts independently of the other. Both sides do not have to be raised at the same time. If a rabbit panics, it can easily jump out of the back half due to the low walls when the roof is lifted. When the roof is closed, it must be latched to prevent the wind from catching it and lifting it up. When this happens there is a strong possibility of flipping the entire duplex. This happened once about 6 years after building it. Thankfully it was empty at the time. We had 60 mph wind gusts at the time. The roof hadn't been latched which of course was an accident. It took two people to get the duplex to rights. Thankfully, it wasn't damaged. There was a lot of wind damage all over the farm that day. Including downed trees. My thoughts are that a future duplex should be built with access doors at the front and sides. The roof would be fixed, not made to lift. It would be built to house one or two rabbits per side. Note: if you choose to house two rabbits (or more) together, they should either be a mother and her kits or neutered/spayed rabbits. These changes would make each side more accessible while allowing to raise the inner height which would provide more ceiling space towards the rear. If you don't want to build a hutch or duplex and don't want your rabbits in your home, you can always build a rabbit house. The size needed will depend on how many rabbits you plan to care for and what your goals are. There are a lot of options in this regard. You can go pretty simple with a prefab shed or go all out with a bunny palace. Your rabbit house can also function as your Spinning Shed or She Shed or Man Cave. You can create a visually appealing structure in which you can sit and work on your fiber arts while also enjoying the company of your angora rabbits. If breeding for show is your main objective, you may wish for the most efficient utilitarian set up possible for maximum efficiency. Or perhaps you want a little of both worlds, you enjoy breeding for show but also have a love of fiber; your rabbit house should be built to suit your needs and the needs of your rabbits. As with hutches, you still need to pick an appropriate area for your rabbit house. Consider the direction the wind blows in from and pick a well shaded area. I personally am not a fan of rabbit houses in the summer as they require air conditioning. Should the air conditioner fail or the power go out, you could come home to dead angora rabbits. While this has never happened to me, I know breeders who had incredible show lines loose all their bunnies in one fatal swoop thanks to the electricity going out. A rabbit house is a wonderful winter option, but in the summer, I like to keep my angora rabbits outside where they have plenty of fresh air and can naturally acclimate to the changes in the weather. If you want your angora rabbits to live in a colony, you will need to ensure that you bury fencing so that predators cannot dig under the fencing and so your burrowing bunnies cannot dig themselves out. If you don't want to bury your fencing, another option is to lay fencing on the ground inside the colony pen. You will need to secure the ground fencing to the side fencing so that nothing can squeeze in or out. A 2x4 or similar lumber frame on the outside of the colony pen adds stability while also giving both the side and bottom fencing something to secure to. You can also use wire cage clips to attach the bottom to the sides. You will need wire clip pliers to attach the cage clips to the fencing. The top of the pen will need to be enclosed to protect from both ground and aerial predators. You can use an open roof by putting up additional fencing, or build a roof. You can also do a combination of both. Your pen needs to be suitably sized for the amount of rabbits you wish it to hold. There are a lot of problems that can crop up when housing your angora rabbits in a colony. While this is the dirtiest option for their long coats, rabbits enjoy this lifestyle the most. Should you choose this lifestyle, you must groom your rabbits daily. No exceptions. If you do not have the time, this is likely not the best option for you. The one workaround is that you can keep your angora rabbits sheared. You will need to do this more often then you would when utilizing their coats for spinning and other fiber crafts. Most people choose this option if they are not interested in saving their angora's wool. If your goal in raising colony rabbits is to let them breed naturally, you will more than likely find your does have a much shorter lifespan. Even though a doe can refuse to breed, in most cases she will still allow herself to be over bred. A better option is to keep your bucks and your does separate for the health and well being of your rabbits. Note: you cannot house bucks together when they are sexually mature. Your bucks will need to be kept solitary. Most does can live together, but do not be surprised if they fight. Sexually intact female rabbits can and will fight. Not always, but it does happen. The safest way to have a angora rabbit colony is to have every single rabbit in the colony fixed (spayed &/or neutered). Be sure to spend plenty of time with your colony rabbits. Creating a nice place for yourself to sit and read or perhaps groom them while in their colony pen is a wonderful way to enjoy them while also monitoring them. Please see my Angora Rabbit Care article for more details on caring for your rabbit. This article is suitable for any rabbit lifestyle. Fixed angora rabbits that are properly cared for and housed are very happy rabbits that are likely to live a very long life. Important consideration when keeping rabbits outdoors in any type of set up: There is a virus called Rabbit hemorrhagic disease Serotype 2 or RHDV2. It was first detected in North America on Delta and on Vancouver Island, Canada in feral rabbits - February 2018. It has an 80% kill rate. Unfortunately RHDV2 is easily spread in many ways. Such as through direct contact with infected rabbits, exposure to infected bodily fluids, food, water, dead carriers, and other infected material, including your own shoes, or even freshly grown garden goods, hay, etc. Scavengers and birds are also suspected to play a role in transmission of the virus. Symptoms may include the following: Sudden death &/or blood staining around the nose, caused by internal bleeding, fever, anorexia, respiratory/nervous signs. At the time of my post, there is a vaccine, but it is difficult to get in all states in the USA. In my state of West Virginia, I spoke to my veterinarian. She explained to me that she cannot get the vaccine. Some states, such as California seem to be a little easier in obtaining the vaccine. The vaccine is available in the USA under an emergency authorization by the USDA Center for Veterinary Biologics. Update April 4, 2024: At this time, the RHDV2 vaccine is available in 45 states. It still doesn't have full FDA approval. Vaccine side effects include mild swelling at the injection site, mild fever, and lethargy for a few days. If you are concerned about RHDV2 I strongly recommend contacting your veterinarian or state agricultural agency. RHDV2 does not impact human health. You may also like:
0 Comments
|
Affiliate DisclosureAs an Amazon Associate, I earn from qualifying purchases.
This page may contain Amazon affiliate links. If you choose to make a purchase after clicking a Amazon link, I may receive a commission from Amazon at no additional cost to you. As always, Thank you so much for your support. I couldn't do what I do without you! Categories
All
Archives
April 2024
 Hi there! My name is Jen. I'm a "tree hugging dirt worshiper" who has been organically farming for nearly two decades. It never ceases to amaze me at how much I've learned & how much I am still learning. I have studied natural health, nutrition, & herbs for nearly three decades. Our health & the natural world around us are connected in ways we don't often realize. How we treat the land & animals directly affects us in both body & mind. My goal is to provide others with truly natural humane goods from my own little piece of paradise, & to freely pass along whatever knowledge I pick up along the way. I am grateful every day to be able to have such a worthwhile & fulfilling job surrounded by the beauty & unpredictability of Mother Nature. Hi there! My name is Jen. I'm a "tree hugging dirt worshiper" who has been organically farming for nearly two decades. It never ceases to amaze me at how much I've learned & how much I am still learning. I have studied natural health, nutrition, & herbs for nearly three decades. Our health & the natural world around us are connected in ways we don't often realize. How we treat the land & animals directly affects us in both body & mind. My goal is to provide others with truly natural humane goods from my own little piece of paradise, & to freely pass along whatever knowledge I pick up along the way. I am grateful every day to be able to have such a worthwhile & fulfilling job surrounded by the beauty & unpredictability of Mother Nature.
Copyright
You're welcome to link to Running Bug Farm or use a single image with a brief description to link back to any post. Republishing posts in their entirety is prohibited. |
 RSS Feed
