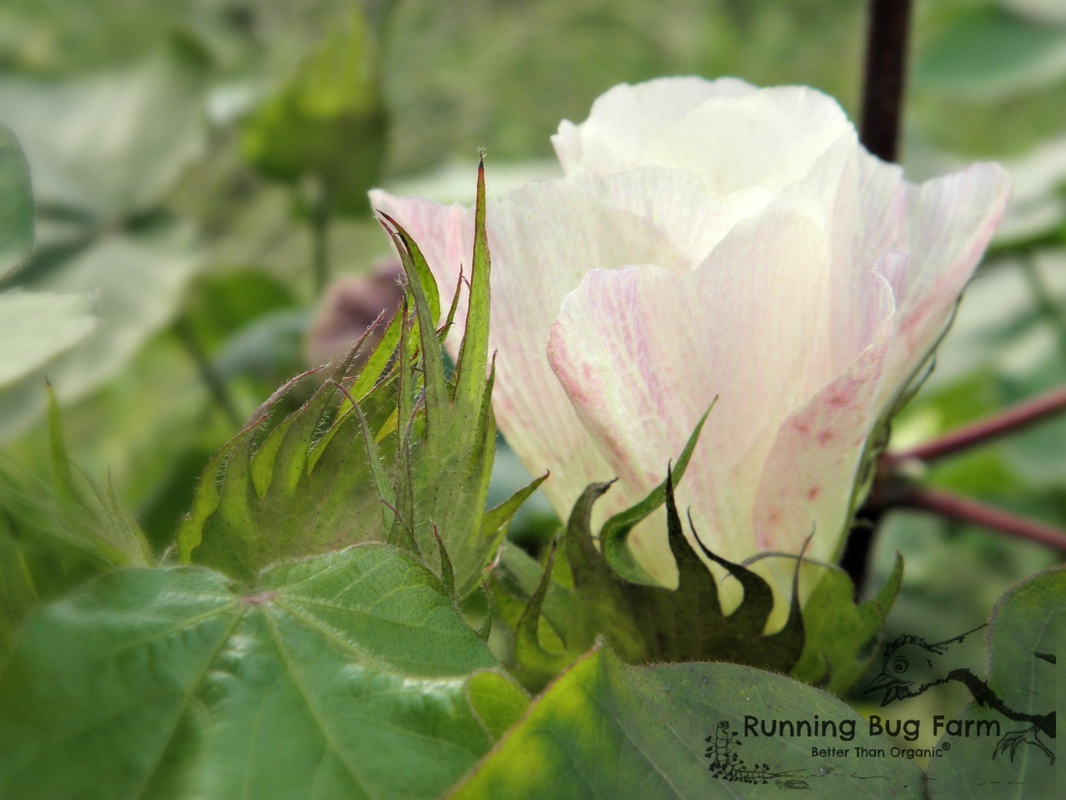
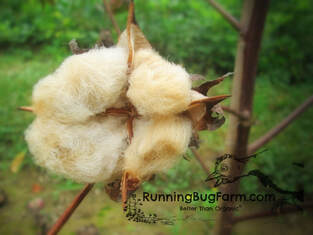
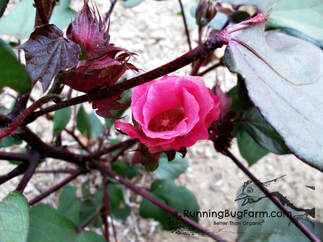
 Heirloom Cotton Flowering Grow your own naturally colored chemical free cotton for spinning, textiles & more! Two years in a row I grew four kinds of heirloom cottons: Arkansas Green, Nankeen, Red Foliated White & Erlene's Green from organic seeds. Cotton can cross pollinate. The seed I am selling has likely cross pollinated so I cannot tell you what type of cotton you will grow, but I expect it should add some excitement to your garden! If you spin, you will welcome having your very own chemical free cotton. Everyone should try growing cotton at least once, it is a memorable experience rich in American history. Cotton is an annual plant that requires a long, warm growing season to mature properly. Needs full sun. In zones 8–10 it can be sown directly after the last frost. In zones 5–7, treat like tomatoes, start seed indoors and transplant out 4–8 week-old seedlings after last frost. Seed germinates in 7–21 days at 70°F. Plant 18–30 in. apart in rows 5 ft. apart. Plants start flowering in mid-summer. Bolls take a few more months to mature; warm late summer weather is necessary for a good crop. Plants grow to 3–7 ft. tall. Direct Sowing: Sow seed in a light, well drained, slightly acid to neutral soil. Supply soil generously with compost or other organic matter, especially in clay. Sow no deeper than 2 - 4 times the seed diameter. Do not sow in waterlogged soil or heavy clay. Transplanting: Use a good quality sterile seed starting mix. Sow pots or flats 4 - 8 weeks before transplanting. When several leaves have developed, harden off the seedlings by placing them outdoors in direct sunlight for no more than an hour. Gradually increase the outdoor exposure over a period of several days. Transplant to the garden after the last frost. Harvest: wait for bolls to split open before harvesting. Seed Savers: Isolate varieties by 1/8 mile for home use, or 1/4 to 1/2 mile or greater for pure seed. 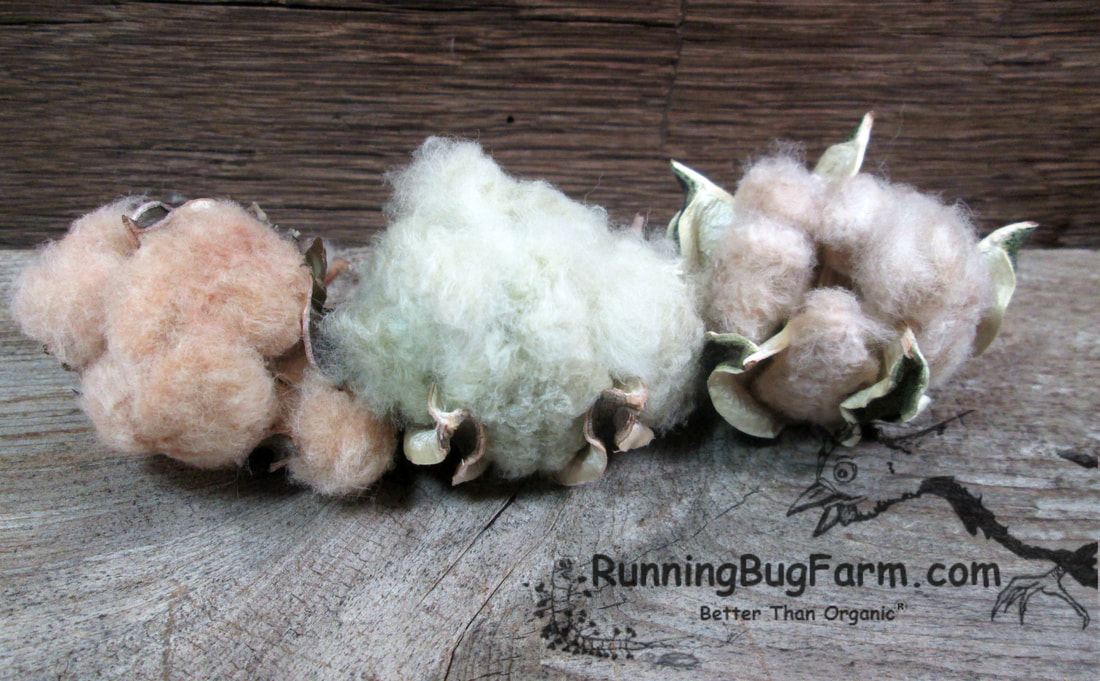 Three Examples Of Natural Heirloom Cotton Colors "Conventional cotton is considered the world's 'dirtiest' crop due to its heavy use of insecticides, the most hazardous pesticide to human and animal health. Conventional cotton covers 2.5% of the world's cultivated land yet uses 16% of the world's insecticides, more than any other single major crop. Aldicarb, parathion, and methamidopho, three of the most acutely hazardous insecticides to human health as determined by the World Health Organization, rank in the top ten most commonly used in cotton production. All but one of the remaining seven most commonly used are classified as moderately to highly hazardous. Aldicarb, conventional cotton's second best selling insecticide and most acutely poisonous to humans, can kill a man with just one drop absorbed through the skin, yet it is still used in 25 countries and the US, where 16 states have reported it in their groundwater." - Organic Trade Association 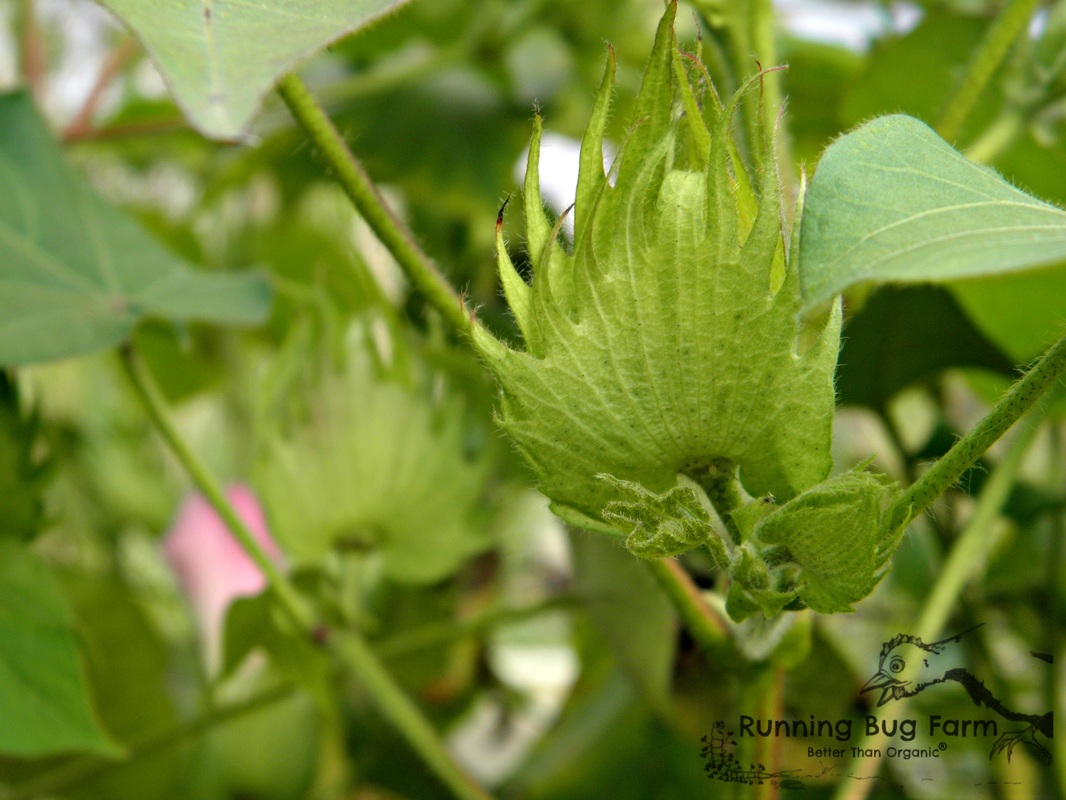 The Start Of A Boll After Flowering Garden Growing Guide Quick Links Listed alphabetically Arkansas Green Cotton Blue Podded Shelling Peas Catnip Cilantro (Coriander) Cocks Comb (Cleosia) Common Milkweed (Asclepias syriaca) Dill Dyer's Woad Erlene's Green Cotton Hibiscus Holy Basil (Tulsi) Inchillium Red Softneck Garlic Kale Karina Peas Lemon Balm Mixed Cotton Musquee de Provence Nankeen Cotton Purple Podded Pole Beans Red Foliated White Cotton Sea Island Brown Cotton Spinach Sunflowers Tennessee Red Valencia Peanuts You may also like:
0 Comments
|
Affiliate DisclosureAs an Amazon Associate, I earn from qualifying purchases.
This page may contain Amazon affiliate links. If you choose to make a purchase after clicking a Amazon link, I may receive a commission from Amazon at no additional cost to you. As always, Thank you so much for your support. I couldn't do what I do without you! Categories
All
Archives
April 2024
 Hi there! My name is Jen. I'm a "tree hugging dirt worshiper" who has been organically farming for nearly two decades. It never ceases to amaze me at how much I've learned & how much I am still learning. I have studied natural health, nutrition, & herbs for nearly three decades. Our health & the natural world around us are connected in ways we don't often realize. How we treat the land & animals directly affects us in both body & mind. My goal is to provide others with truly natural humane goods from my own little piece of paradise, & to freely pass along whatever knowledge I pick up along the way. I am grateful every day to be able to have such a worthwhile & fulfilling job surrounded by the beauty & unpredictability of Mother Nature. Hi there! My name is Jen. I'm a "tree hugging dirt worshiper" who has been organically farming for nearly two decades. It never ceases to amaze me at how much I've learned & how much I am still learning. I have studied natural health, nutrition, & herbs for nearly three decades. Our health & the natural world around us are connected in ways we don't often realize. How we treat the land & animals directly affects us in both body & mind. My goal is to provide others with truly natural humane goods from my own little piece of paradise, & to freely pass along whatever knowledge I pick up along the way. I am grateful every day to be able to have such a worthwhile & fulfilling job surrounded by the beauty & unpredictability of Mother Nature.

Copyright
You're welcome to link to Running Bug Farm or use a single image with a brief description to link back to any post. Republishing posts in their entirety is prohibited. |
 RSS Feed