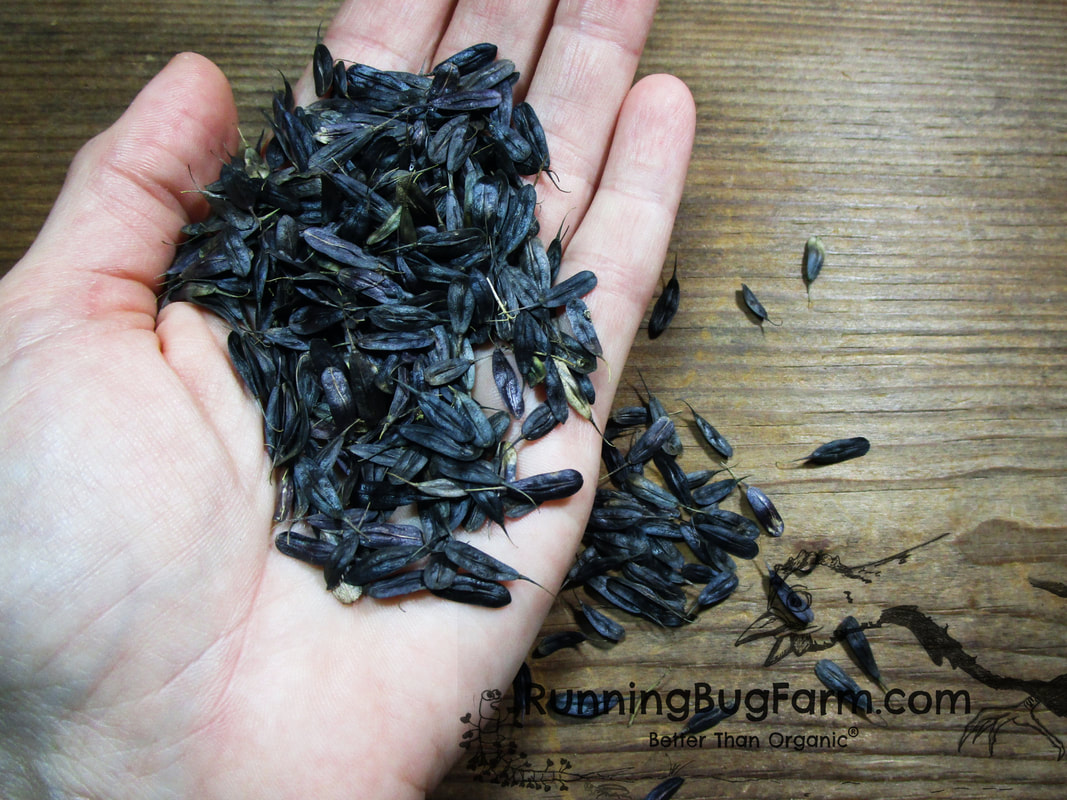
 Lantern-Like Seeds From My Woad Plants For the love of woad. I am a indigo addict. Unfortunately true indigo doesn't grow in my area. That's not to say it can't be grown, or that I haven't grown it, rather that it will die come winter. Sometimes I just want my plants to last and thrive. I have enough that must be replanted each year. Woad, a biennial, is my Eco Farm Gal plant of choice as a result. My love for woad doesn't end there. It's flowers also attract butterflies and birds. Historically, it was used during the Viking era as a blue dye. With so little known about the Vikings, I love knowing I'm utilizing such an ancient and prized plant. Besides, who doesn't want to ditch the synthetic dyes, many of which are cancer causing and embrace what Mother Nature has provided? A Note Of Caution:
The leaves of the woad plant are what produce the traditional blue dye that woad is and was cultivated for. This process involves collecting the leaves, drying them, and then infusing them with an alkali to produce the deep blue dye woad is known for. In the early summer, dyers woad produces large clusters of cheerful golden yellow flowers. These blooms then transition into flattened, dark, seed heads with a lantern-like appearance. Dyer’s woad can grow to 4 feet tall and 18 inches wide within its first year. In the second year, it flowers, seeds, and then dies back. In my growing area (zone 6), it often regrows from the long tap root. You can zero in on your USDA Plant Hardiness Zone here. It also self sows. Because it self sows readily, I thin when the plants are still small, but not too small, with nice leaves that I can dry. The smaller plants are much easier to pull from the ground, ensuring I also remove the long tap root. I brush off any dirt and hang the small plants by their tap roots to dry. You can also use the dye leaves fresh. Add the fresh leaves to water along with some salt and massage. Notes:
To ensure a steady supply of leaves throughout the summer and fall, plant at least two beds about two weeks apart per bed. Despite it's deep taproot, woad will wilt in extreme summer heat if the soil is not kept moist. It is drought-tolerant once established. Crop rotation is generally recommend for each year. Being an invasive plant, I have had success leaving it to grow in it's original location as long as I maintain the correct soils. I also grow my woad with lavender and madder. When/If any problems pop up for me, I will update this article to assist my fellow growers. If you don't want your plants to reseed, cut off the yellow flower heads before they can form seed heads. If you are behind schedule, (and who isn't during the dog days of summer) don't despair. As the little lantern shaped pods start to dangle, they will be green. You can still cut them off if you do it early enough. You want to catch them before the seed heads start to darken for the greatest chance of success. 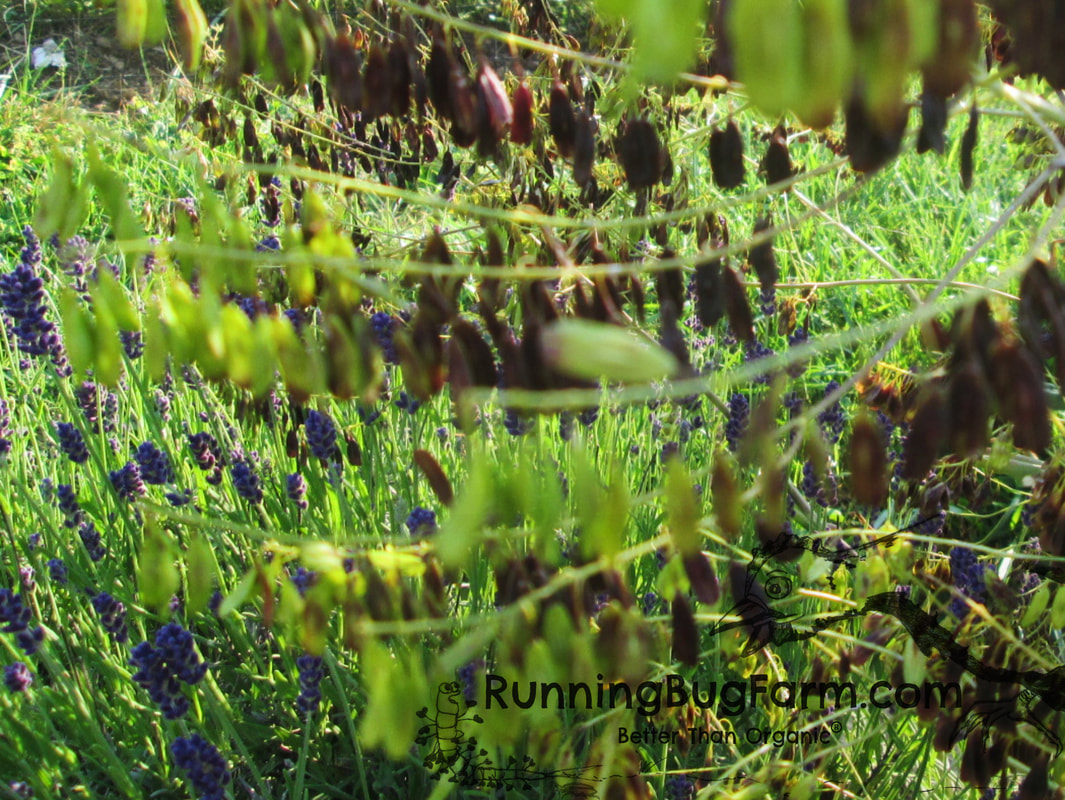 Dyer's Woad Seeds During Transition From Green To Purple-Brown With Lavender Growing In The Background Growing Guide Dyer's Woad is a biennial plant in the Brassicaceae also known as the Cruciferae, mustard family. Its life cycle takes two years. Its leaf phase of growth is during the first year. The leaves are the part of the plant that produces blue. During woad's first summer and fall, you can harvest from the same plants several times. Soak seeds in tepid water for 24 hours prior to planting. Botanical Name: Isatis tinctoria Start indoors: 4-6 weeks before the last frost. Transplant starts 12” apart in moist, well drained soil. Sow outside (direct sow): In the spring as early as 2-4 weeks before the last frost or anytime during the growing season. Soil Temperature For Germination: 65-70°F Size: 12" - 48" Zone: 4-8 Sun: Full Water: Moist, Well Drained Soil: Neutral to Slightly Alkaline Seed Planting Depth: 1/8" Seed Spacing: 2" - 3" Days to Germination: 7-10 Thinning: 18" Seed Savers: Over-winter the plants. Allow them to bloom and set seed in their second year. Insect Control: Floating row cover, barrier netting, or remove by hand as needed. I find that floating row cover is much more durable and lasts longer. The downside is that it's not easy to see through and harder to water through although it is permeable. Barrier netting is easy peasy to see through and water through. The downside is that it is easy to damage and not as long lasting. 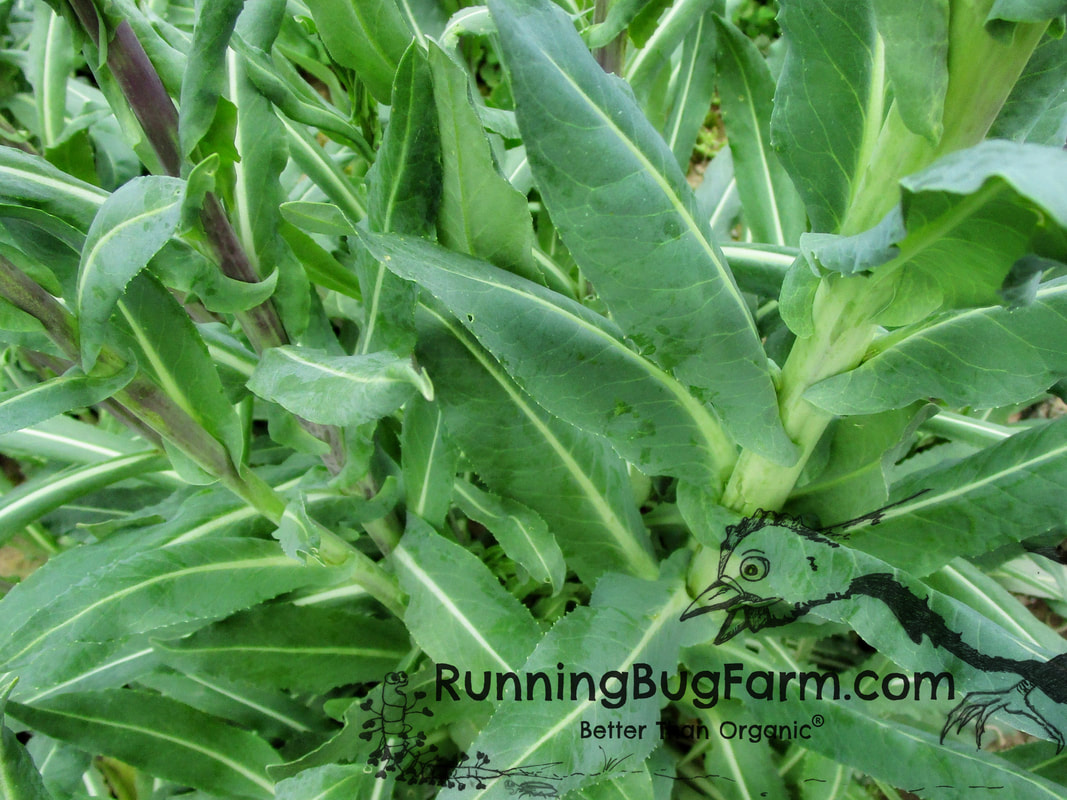 Second Year Woad Just Beginning To Bud, But Not In Bloom Garden Growing Guide Quick Links Listed alphabetically Arkansas Green Cotton Blue Podded Shelling Peas Catnip Cilantro (Coriander) Cocks Comb (Cleosia) Common Milkweed (Asclepias syriaca) Dill Dyer's Woad Erlene's Green Cotton Hibiscus Holy Basil (Tulsi) Inchillium Red Softneck Garlic Kale Karina Peas Lemon Balm Mixed Cotton Musquee de Provence Nankeen Cotton Purple Podded Pole Beans Red Foliated White Cotton Sea Island Brown Cotton Spinach Sunflowers Tennessee Red Valencia Peanuts You may also like:
0 Comments
|
Affiliate DisclosureAs an Amazon Associate, I earn from qualifying purchases.
This page may contain Amazon affiliate links. If you choose to make a purchase after clicking a Amazon link, I may receive a commission from Amazon at no additional cost to you. As always, Thank you so much for your support. I couldn't do what I do without you! Categories
All
Archives
April 2024
 Hi there! My name is Jen. I'm a "tree hugging dirt worshiper" who has been organically farming for nearly two decades. It never ceases to amaze me at how much I've learned & how much I am still learning. I have studied natural health, nutrition, & herbs for nearly three decades. Our health & the natural world around us are connected in ways we don't often realize. How we treat the land & animals directly affects us in both body & mind. My goal is to provide others with truly natural humane goods from my own little piece of paradise, & to freely pass along whatever knowledge I pick up along the way. I am grateful every day to be able to have such a worthwhile & fulfilling job surrounded by the beauty & unpredictability of Mother Nature. Hi there! My name is Jen. I'm a "tree hugging dirt worshiper" who has been organically farming for nearly two decades. It never ceases to amaze me at how much I've learned & how much I am still learning. I have studied natural health, nutrition, & herbs for nearly three decades. Our health & the natural world around us are connected in ways we don't often realize. How we treat the land & animals directly affects us in both body & mind. My goal is to provide others with truly natural humane goods from my own little piece of paradise, & to freely pass along whatever knowledge I pick up along the way. I am grateful every day to be able to have such a worthwhile & fulfilling job surrounded by the beauty & unpredictability of Mother Nature.

Copyright
You're welcome to link to Running Bug Farm or use a single image with a brief description to link back to any post. Republishing posts in their entirety is prohibited. |
 RSS Feed