|
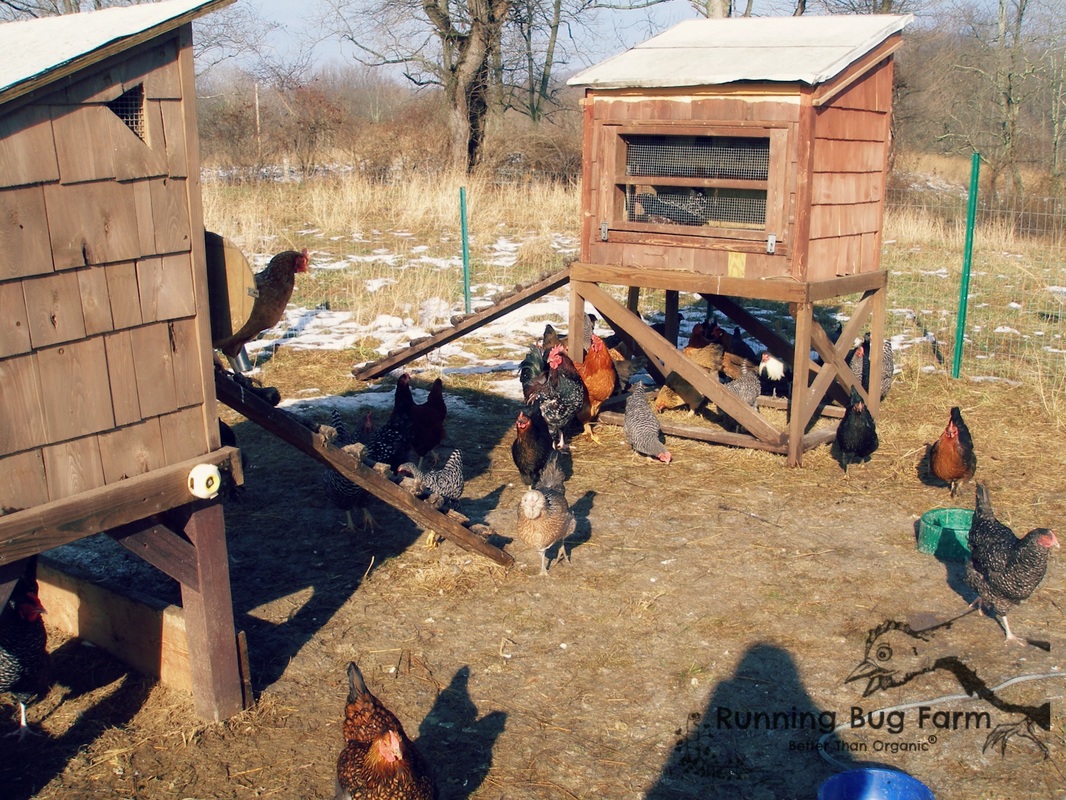
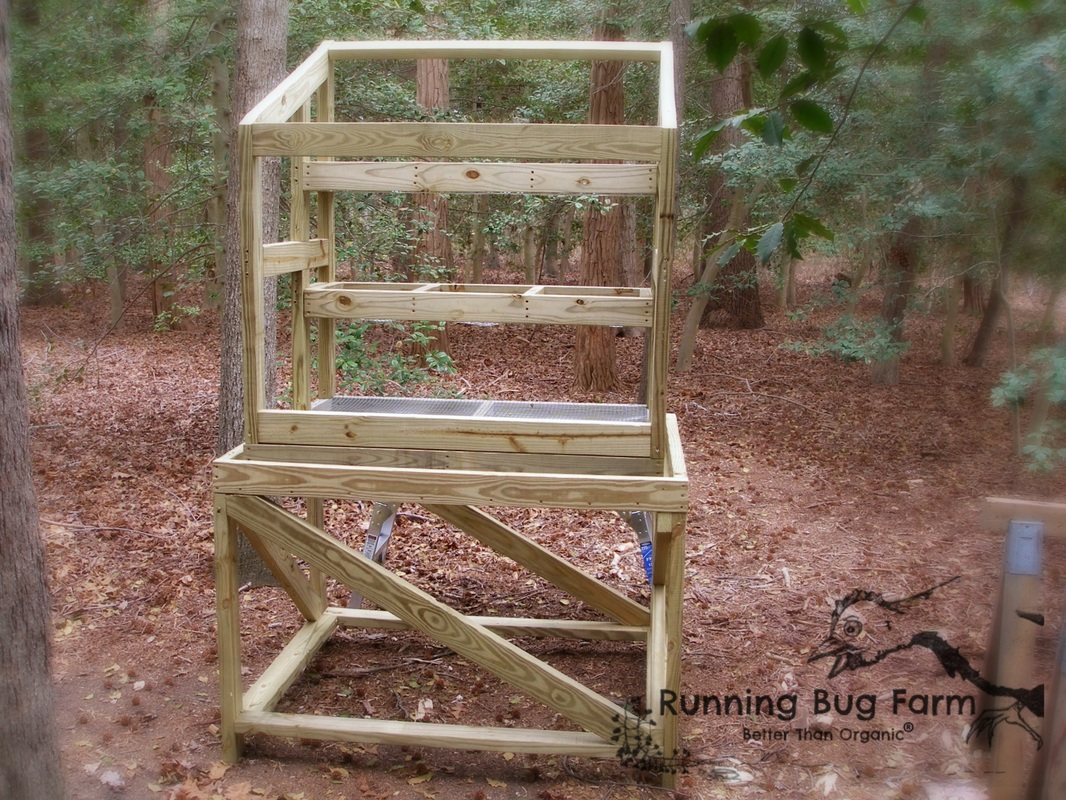
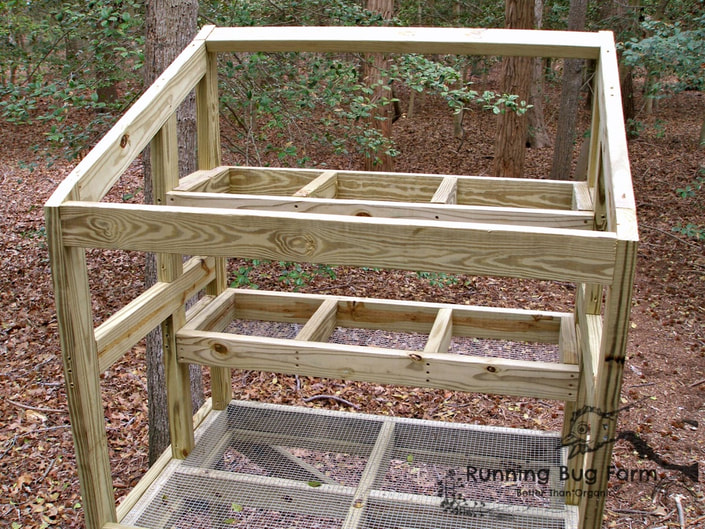
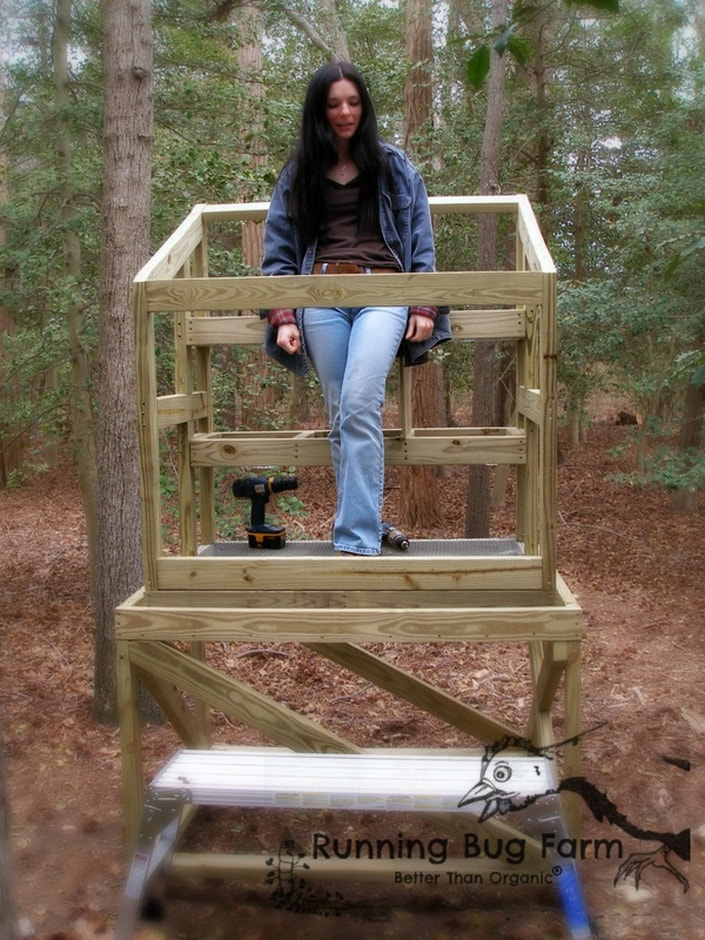
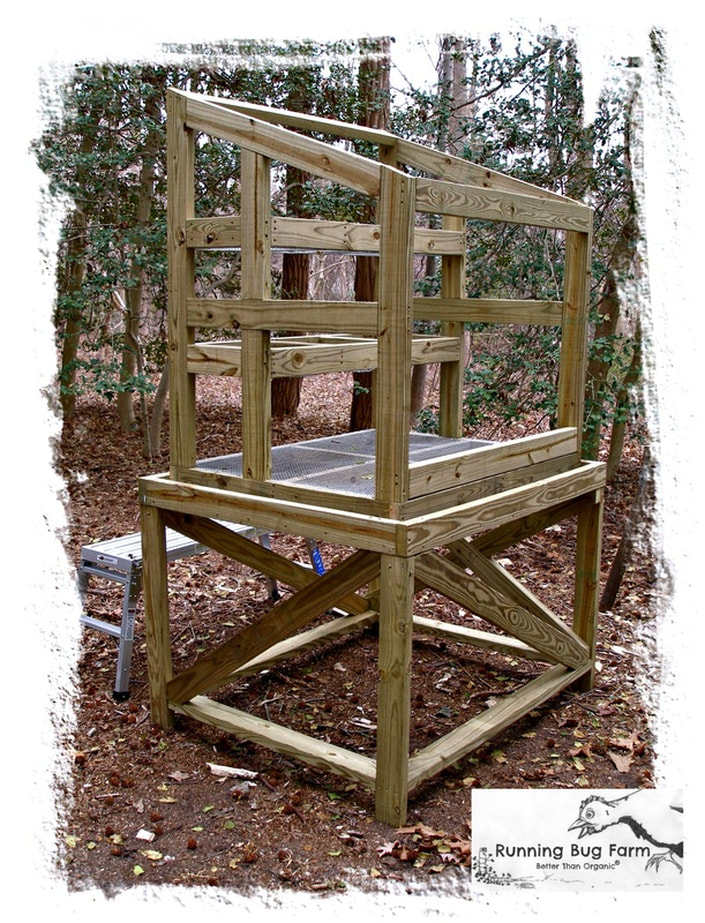
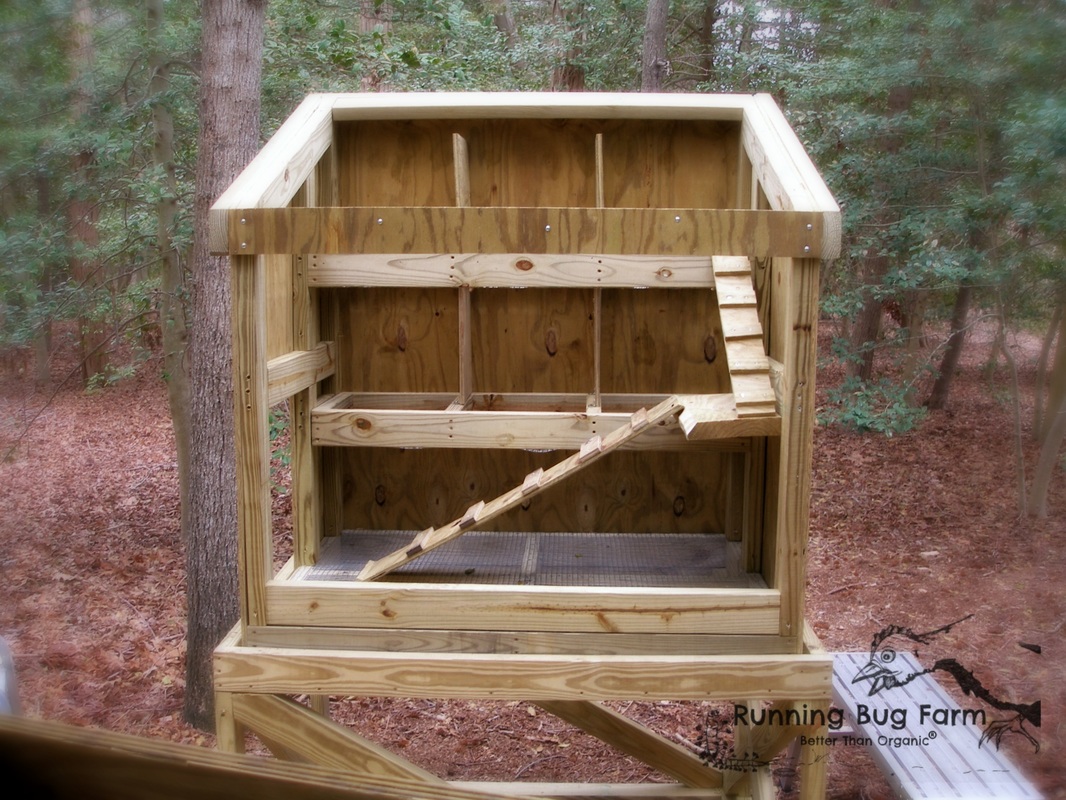
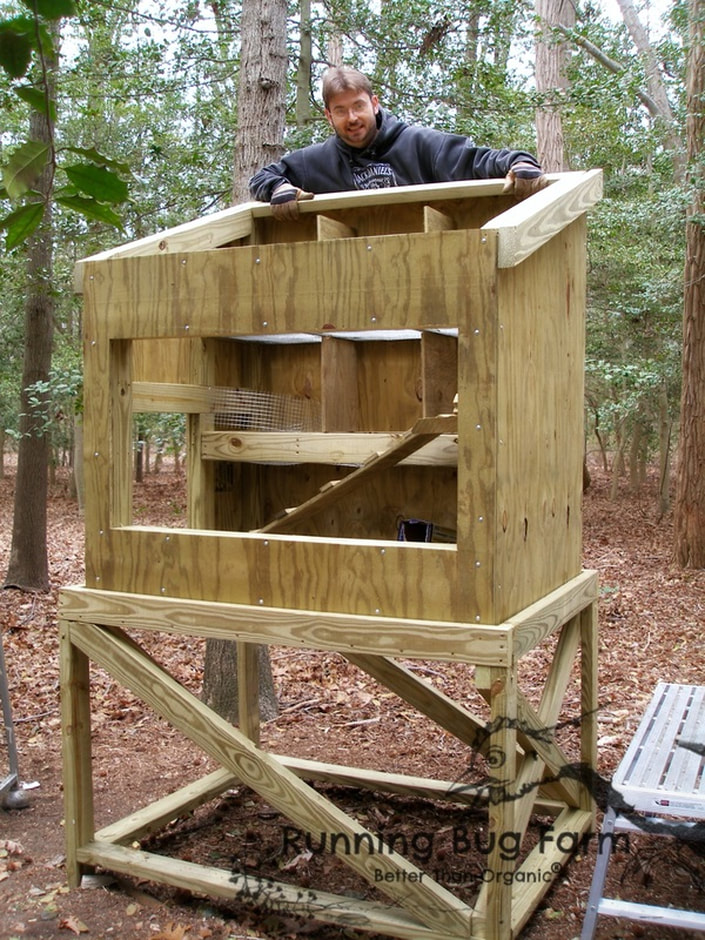
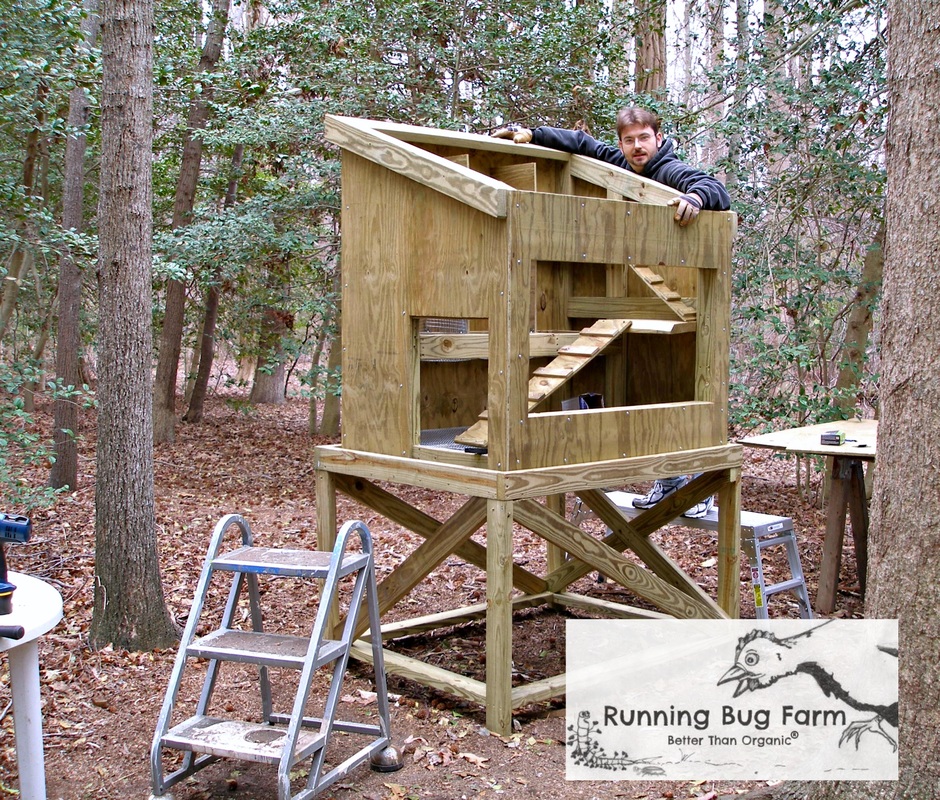
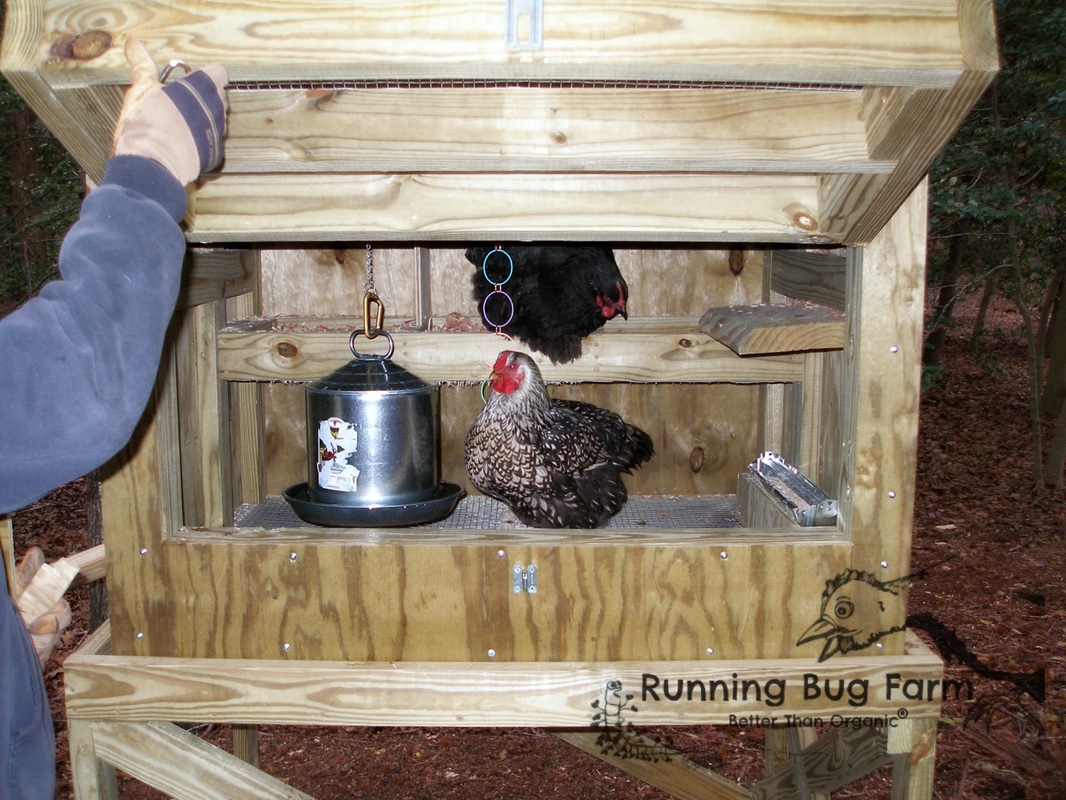
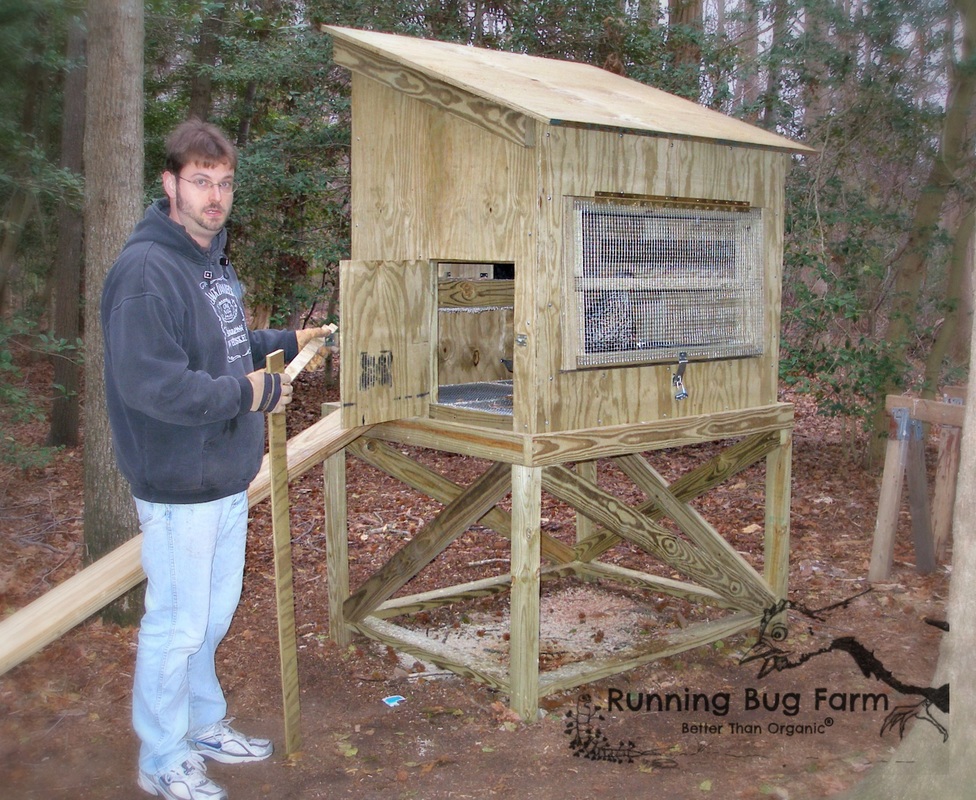
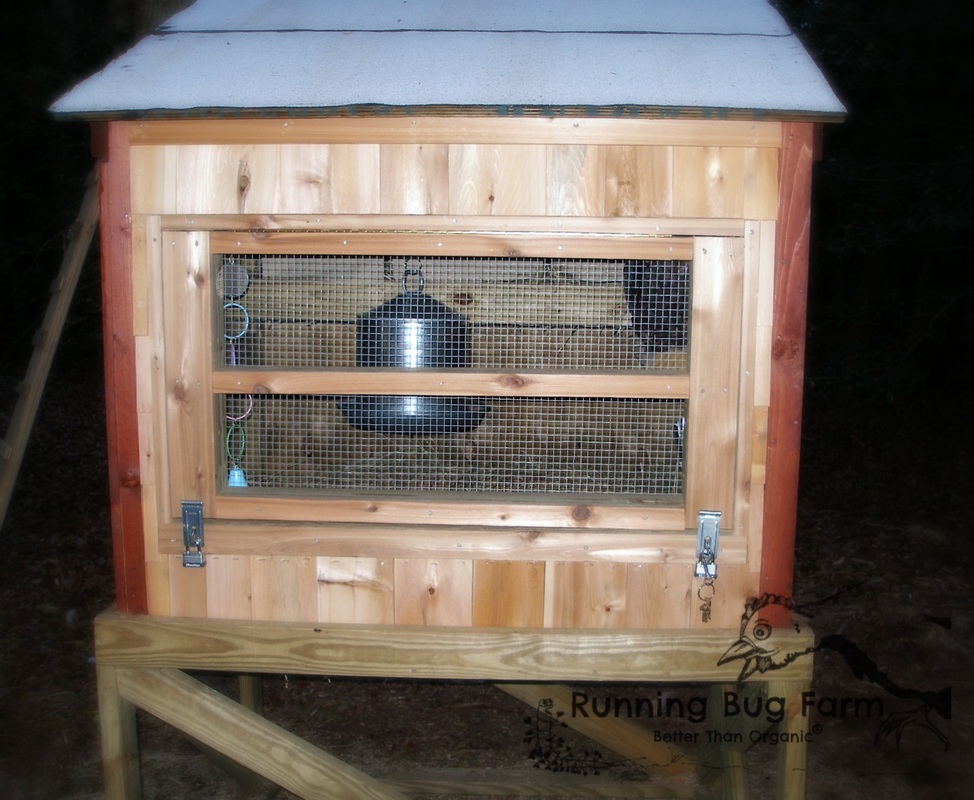
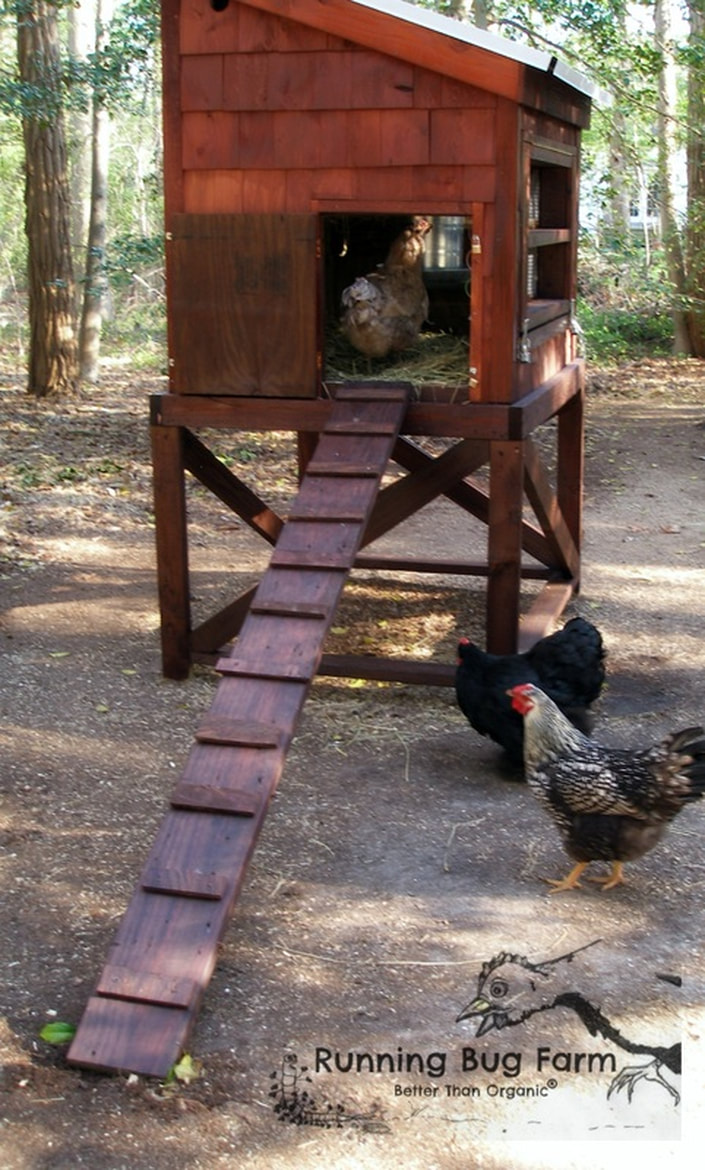
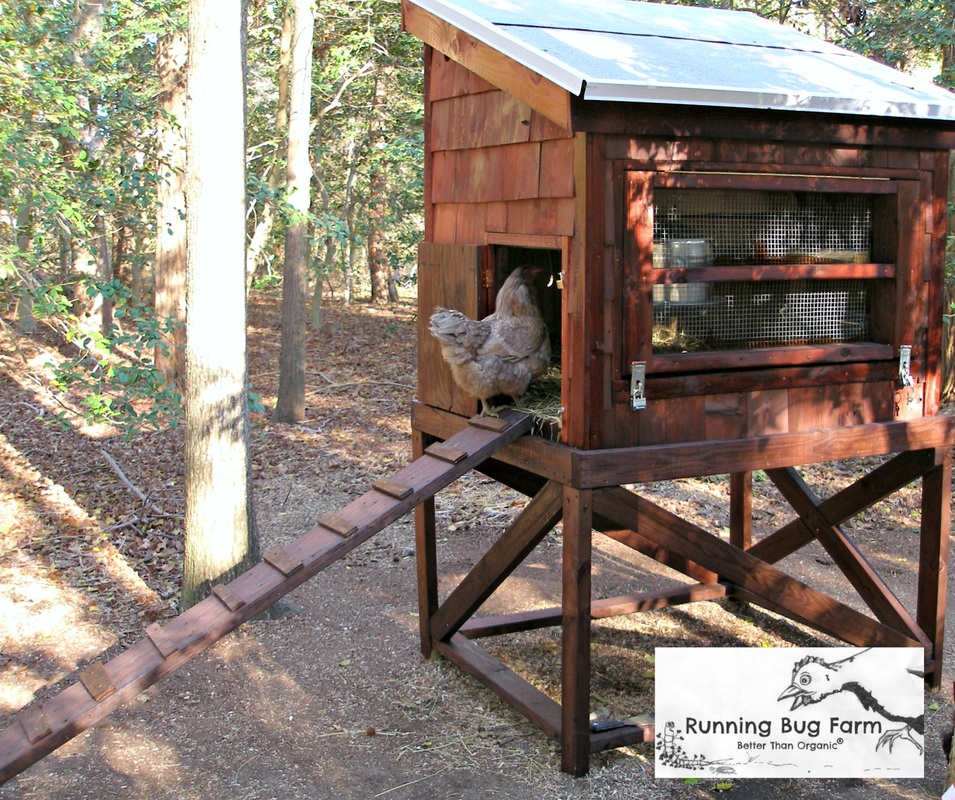
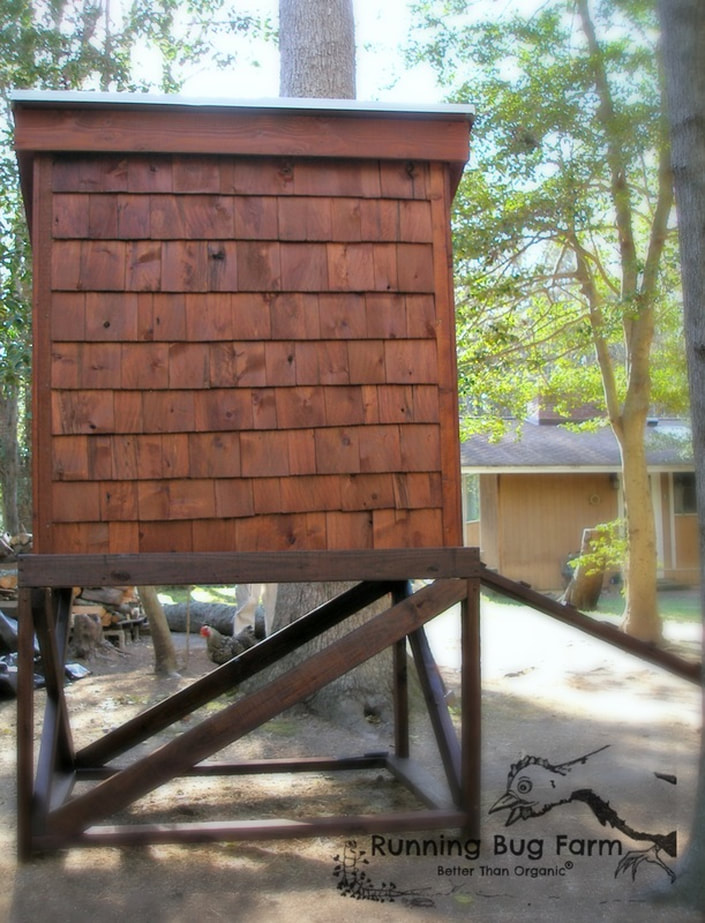
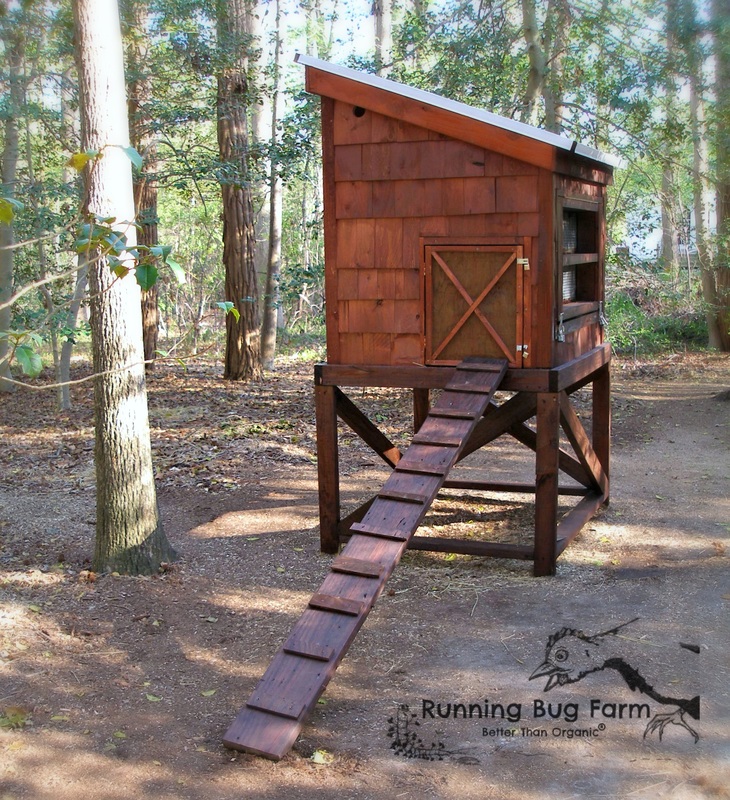
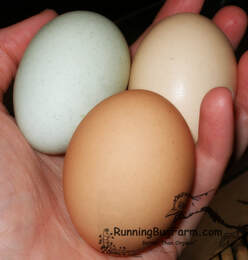
...We vowed to never eat another store bought egg again. -Homesteading: Chickens, Housing, Eggs, & Entertainment! This is part three of our homesteading journey. If you would like to start at the beginning check out Homesteading: It Begins With Health. Our plans didn't include renting for the rest of our lives, so we knew we needed a hen house that we would be able to move in the future. We decided to build a house that would sit upon a sturdy stand. This way the house itself could be removed from the stand. We also planned to attach wheels to make moving it even easier but we never did. Having the coop up off of the ground was to help keep snakes & other ground predators out as well as make it easier for us to get into. We used all new lumber & hardware. We used screws rather than nails. The base was built first. Because this was our first attempt at building anything, we were assisted by my father who showed John how to build proper supports & even how to make attractive cuts for the braces. This coop was the start to many more building projects. We can thank our girls (chickens) for our new venture & for being the motivation we needed to learn & grow. We wanted to make sure that the house had good airflow. I read many stories about poultry housing where the air quality was horrible, that to even enter such a place, masks were in order. If it burns our lungs, it is surely burning the birds lungs. We wanted a humane life for our birds. We opted for hardware cloth on every bottom surface. This way anything wet would fall through. Smaller debris would fall through as well, helping to keep the small space cleaner. The longer it was kept clean, the less often we would have to muck it. The hardware cloth was attached by using fencing staples. These are a much stronger staple than your typical staple gun staples. They are a bit of a pain to get in place because you have to hold the little U shaped buggers while whacking at them with a hammer. Watch out fingers! John added two upper levels for egg laying. He put hardware cloth on the bottoms of the nest boxes as well. The two upper levels had three nesting holes per level. Plywood dividers were installed to give each hen her own private space. Due to a lack of space, we later decided to remove the lower level & lowered the upper level, giving us three nesting boxes total. The roof slants down over the front. We have learned that having the roof slant towards the back would have been a better choice. It slanted towards the front because of the nest boxes in the back. John built a big door for ourselves to get into for cleaning, feeding & egg collection. He put a smaller chicken door on the side for the birds to use. John added ramps so the hens could reach the nesting areas. We quickly learned that this was unnecessary as the hens would simply hop & flap their wings a bit to get to the nesting boxes. After the first day of use, John removed the ramps. This freed up a lot more space for the birds & made cleaning easier on us. Next came the sheathing. John used regular plywood like you use to build a house. We wanted a strong house. A hen house that could withstand our New England Nor'easters. Something that could handle two feet of snow on the roof without collapsing. Something heavy enough not to be blown over when those hurricane force gusts punch through. John succeeded. This house, the house a newbie built (with help) is one of our sturdiest chicken houses. It has been through a lot & is still in use to this very day. Once the sheathing was on, John installed the doors. Again, he used home building quality materials for the doors. We decided to use padlocks with keys. We were not worried about someone trespassing onto our property to steal our hens, we were worried about the abundance of nighttime marauders, namely raccoon's. These animals are smart but wasteful killers. We decided that with a padlock there was no way they would figure out how to open these doors. We were right. We have never had a raccoon manage to get into a properly secured house. A house that has not been properly secure is an entirely different matter I will save for another post. The main door opens up with side brackets that lock the door in place. Hardware cloth was added to provide light & air flow. Like the floors, the hardware cloth was nailed down with fencing staples. It was then framed out with more lumber, adding additional strength, appearance, & keeps the jagged edges of the hardware cloth from tearing clothing or skin. During the winter we add plexi glass to the front to block the wind & keep out snow. We originally added one lock to the center of the side door, but decided to change it to two locks, one at the top of the door & one at the bottom to make the door more secure. We were concerned about raccoon's pulling at the corners of the door & possibly breaking in. By locking the top & bottom, we removed this potential security breach. Because the house was so high off the ground, the birds needed a ramp to get in & out. Again, John used building quality lumber for the ramp. He then added little foot grips because the surface was much too smooth without the little steps; the girls can't climb up a smooth ramp. He originally used a strip of scrap plywood, cut it to size & screwed it onto the ramp. He added two screws per step. When the steps needed to be replaced we opted for natural branches. John screwed them in place the same way he did the scrap plywood. The branches eventually break down & need replacing, but they are free & make very natural ladder steps for the birds. Once the doors were installed, John put on the roofing. Again, John used home building quality materials for the roof. He did cheap out on the roof protection, using older rolled roofing that you use roofing tar & roll down the roof. Although it's cheap, it has held up fabulously. He added drip edge to all four sides of the roof to give it added protection. The drip edge has suffered damaged due to moving (you can see the damages in the very first picture in the post), but so far the roof has held strong & does not yet need to be replaced or show signs that it will need replacing any time soon. We decided to side it with cedar shake shingles because they were the cheapest option. John previously cut holes on each side of the hen house to reduce heat from building up inside. He had to cut the shingles in order not to block the holes. The holes were reinforced with hardware cloth to keep out predators. When the house was finally finished we decided to stain it with a water based stain. We really like how it turned out. Up next: Adventures In Livestock Auctions
4 Comments
Tanja Mills
3/16/2016 08:22:09 pm
You two are so inspiring. I Love what you do, what you promote and adore your Angora rabbits, chickens, all your critters.. Keep up the good work. You have integrity toward doing what is right.
Reply
Catherine
8/23/2019 12:53:47 pm
Could I sustain guineas or chickens in 4'-5' fenced pens? Looking for ways to not mow in 2020 and create gardening plots-manure and bug control from rotating pea fowl or chicken?
Reply
8/23/2019 12:55:51 pm
Chickens, but you'll probably need to clip their wings. Guineas will likely fly out, even with clipped wings because the fencing is too low. Guineas are better for bug control, but chickens are still good. Neither species will eat everything, so you'll still need to mow unless you don't plan to let them out at all & turn it to dirt.
Reply
Your comment will be posted after it is approved.
Leave a Reply. |
Affiliate DisclosureAs an Amazon Associate, I earn from qualifying purchases.
This page may contain Amazon affiliate links. If you choose to make a purchase after clicking a Amazon link, I may receive a commission from Amazon at no additional cost to you. As always, Thank you so much for your support. I couldn't do what I do without you! Categories
All
Archives
April 2024
 Hi there! My name is Jen. I'm a "tree hugging dirt worshiper" who has been organically farming for nearly two decades. It never ceases to amaze me at how much I've learned & how much I am still learning. I have studied natural health, nutrition, & herbs for nearly three decades. Our health & the natural world around us are connected in ways we don't often realize. How we treat the land & animals directly affects us in both body & mind. My goal is to provide others with truly natural humane goods from my own little piece of paradise, & to freely pass along whatever knowledge I pick up along the way. I am grateful every day to be able to have such a worthwhile & fulfilling job surrounded by the beauty & unpredictability of Mother Nature. Hi there! My name is Jen. I'm a "tree hugging dirt worshiper" who has been organically farming for nearly two decades. It never ceases to amaze me at how much I've learned & how much I am still learning. I have studied natural health, nutrition, & herbs for nearly three decades. Our health & the natural world around us are connected in ways we don't often realize. How we treat the land & animals directly affects us in both body & mind. My goal is to provide others with truly natural humane goods from my own little piece of paradise, & to freely pass along whatever knowledge I pick up along the way. I am grateful every day to be able to have such a worthwhile & fulfilling job surrounded by the beauty & unpredictability of Mother Nature.
Copyright
You're welcome to link to Running Bug Farm or use a single image with a brief description to link back to any post. Republishing posts in their entirety is prohibited. |
 RSS Feed
